mybatis自动建表的实现方法
1.添加ACTable依赖
   <!--mybatis-plus自动建表-->
    <dependency>
      <groupId>com.gitee.sunchenbin.mybatis.actable</groupId>
      <artifactId>mybatis-enhance-actable</artifactId>
      <version>1.1.1.RELEASE</version>
    </dependency>
2.配置(在此需要注意配置的路径部分需要改成自己项目路径)
   <!--mybatis-plus自动建表-->
    <dependency>
      <groupId>com.gitee.sunchenbin.mybatis.actable</groupId>
      <artifactId>mybatis-enhance-actable</artifactId>
      <version>1.1.1.RELEASE</version>
    </dependency>
3.添加配置类
package com.jpxx.clsh.autoconfig;

import com.alibaba.druid.pool.DruidDataSource;
import org.mybatis.spring.SqlSessionFactoryBean;
import org.springframework.beans.factory.annotation.Value;
import org.springframework.beans.factory.config.PropertiesFactoryBean;
import org.springframework.context.annotation.Bean;
import org.springframework.context.annotation.ComponentScan;
import org.springframework.context.annotation.Configuration;
import org.springframework.core.io.support.PathMatchingResourcePatternResolver;
import org.springframework.jdbc.datasource.DataSourceTransactionManager;

/**
 * @ClassName TestConfig
 * @Description
 * @Author Administrator
 * @Date 2020/11/2 0002 11:30
 * @Version 1.0
 */
@Configuration
@ComponentScan(basePackages = {"com.gitee.sunchenbin.mybatis.actable.manager.*"})
public class DataSourceConfig{

  //此处的路径按照yml或properties文件路径
  @Value("${jpxx.datasource.druid.driverClassName}")
  private String driver;

  @Value("${jpxx.datasource.druid.url}")
  private String url;

  @Value("${jpxx.datasource.druid.username}")
  private String username;

  @Value("${jpxx.datasource.druid.password}")
  private String password;

  @Bean
  public PropertiesFactoryBean configProperties() throws Exception{
    PropertiesFactoryBean propertiesFactoryBean = new PropertiesFactoryBean();
    PathMatchingResourcePatternResolver resolver = new PathMatchingResourcePatternResolver();
    propertiesFactoryBean.setLocations(resolver.getResources("classpath*:application.yml"));
    return propertiesFactoryBean;
  }

  @Bean
  public DruidDataSource dataSource() {
    DruidDataSource dataSource = new DruidDataSource();
    dataSource.setDriverClassName(driver);
    dataSource.setUrl(url);
    dataSource.setUsername(username);
    dataSource.setPassword(password);
    dataSource.setMaxActive(30);
    dataSource.setInitialSize(10);
    dataSource.setValidationQuery("SELECT 1");
    dataSource.setTestOnBorrow(true);
    return dataSource;
  }

  @Bean
  public DataSourceTransactionManager dataSourceTransactionManager() {
    DataSourceTransactionManager dataSourceTransactionManager = new DataSourceTransactionManager();
    dataSourceTransactionManager.setDataSource(dataSource());
    return dataSourceTransactionManager;
  }

  @Bean
  public SqlSessionFactoryBean sqlSessionFactory() throws Exception{
    SqlSessionFactoryBean sqlSessionFactoryBean = new SqlSessionFactoryBean();
    sqlSessionFactoryBean.setDataSource(dataSource());
    PathMatchingResourcePatternResolver resolver = new PathMatchingResourcePatternResolver();
    sqlSessionFactoryBean.setMapperLocations(resolver.getResources("classpath*:com/gitee/sunchenbin/mybatis/actable/mapping/*/*.xml"));
    sqlSessionFactoryBean.setTypeAliasesPackage("com.jpxx.clsh.entity.*");
    return sqlSessionFactoryBean;
  }

}
package com.jpxx.clsh.autoconfig;

/**
 * @ClassName MyBatisMapperScannerConfig
 * @Description
 * @Author Administrator
 * @Date 2020/11/2 0002 10:15
 * @Version 1.0
 */
import org.mybatis.spring.mapper.MapperScannerConfigurer;
import org.springframework.boot.autoconfigure.AutoConfigureAfter;
import org.springframework.context.annotation.Bean;
import org.springframework.context.annotation.Configuration;

@Configuration
@AutoConfigureAfter(DataSourceConfig.class)
public class MyBatisMapperScannerConfig {

  @Bean
  public MapperScannerConfigurer mapperScannerConfigurer() throws Exception{
    MapperScannerConfigurer mapperScannerConfigurer = new MapperScannerConfigurer();
    mapperScannerConfigurer.setBasePackage("com.jpxx.clsh.dao.*;com.gitee.sunchenbin.mybatis.actable.dao.*");
    mapperScannerConfigurer.setSqlSessionFactoryBeanName("sqlSessionFactory");
    return mapperScannerConfigurer;
  }

}
4.实体类
package com.jpxx.clsh.entity;

import com.gitee.sunchenbin.mybatis.actable.annotation.Column;
import com.gitee.sunchenbin.mybatis.actable.annotation.Table;
import com.gitee.sunchenbin.mybatis.actable.constants.MySqlTypeConstant;
import lombok.Data;

/**
 * @ClassName Test
 * @Description
 * @Author Administrator
 * @Date 2020/10/30 0030 16:48
 * @Version 1.0
 */

@Data
@Table(name = "aaaaaaaaaaaaaa")
public class Test {

  @Column(name = "role_id", type = MySqlTypeConstant.INT, isNull = false,isKey = true, isAutoIncrement = true, comment = "自增id")
  private Long id;

  @Column(name = "name", type = MySqlTypeConstant.VARCHAR, isNull = false, length = 20, comment = "角色名字")
  private String name;

  @Column(name = "name_zh", type = MySqlTypeConstant.VARCHAR, isNull = true, length = 20, comment = "角色的中文名字")
  private String name_zh;
}
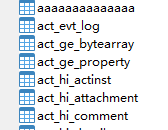
运行日志

到此这篇关于mybatis自动建表的实现方法的文章就介绍到这了,更多相关mybatis 自动建表内容请搜索我们以前的文章或继续浏览下面的相关文章希望大家以后多多支持我们!
相关推荐
-
MyBatis动态创建表的实例代码
项目中业务需求的不同,有时候我们需要动态操作数据表(如:动态建表.操作表字段等).常见的我们会把日志.设备实时位置信息等存入数据表,并且以一定时间段生成一个表来存储,log_201806.log_201807等.在这里我们用MyBatis实现,会用到动态SQL. 动态SQL是Mybatis的强大特性之一,MyBatis在对sql语句进行预编译之前,会对sql进行动态解析,解析为一个BoundSql对象,也是在此对动态sql进行处理. 在动态sql解析过程中,#{ }与${ }的效果是不一样的:
-
Mybatis自动创建表和更新表结构
最近有小伙伴问我mybatis有没有自动创建表结构的功能,因为他们之前一直使用hibernate用习惯了,理所当然的认为,在实体类上配置下注解或者写写映射文件,系统启动后就可以自动创建表. 我只能很遗憾的告诉他,mybatis并没有这个功能,看他兴致阑珊的样子,我只能安慰他,就算没有这功能,我们可以自己开发啊~~ 所以就有了下面这套系统,已开源大家可以下来看看~~ Mybatis_BuildTable_V0.2 https://git.oschina.net/sunchenbin/Mybatis
-
mybatis自动建表的实现方法
1.添加ACTable依赖 <!--mybatis-plus自动建表--> <dependency> <groupId>com.gitee.sunchenbin.mybatis.actable</groupId> <artifactId>mybatis-enhance-actable</artifactId> <version>1.1.1.RELEASE</version> </dependency>
-

Springboot引入hibernate配置自动建表并进行增删改查操作
目录 前言 一.引入依赖 二.配置yml 三.写代码 四.测试结果 前言 有些业务比较复杂,比如我们需要新建10张表,每张表有10个字段,如果用手工来操作,肯定非常浪费时间,而且随着代码中对实体类的修改,还要同时修改数据库表,有时候写着写着就忘了,代码改了,数据库没改,这种问题使用 hibernate 的自动建表就好啦. 一.引入依赖 <dependency> <groupId>org.springframework.boot</groupId> <artifac
-
HTML页面禁用Enter键自动提交表单的方法
在HTML页里面由于使用了form,常常需要禁用enter提交表单.因为内容页或者母版页自身有如果有type="submit"的button,当textbox聚焦时,按下enter都会触发表单的默认提交(不论是IE还是firefox),于是需要在onkeydown中监听用户的按键.实际测试,IE8中导致表单提交的不确定因素太多,点击表单的table中的td都会触发表单提交,而firefox则不会:于是在ie和ff中禁用表单提交需要不同的思路. 对于IE: 只有当事件源是TEXTAREA
-
php自动提交表单的方法(基于fsockopen与curl)
本文实例讲述了php基于fsockopen与curl实现自动提交表单的方法.分享给大家供大家参考,具体如下: fsockopen和curl都可以做php自动提交表单 1. fsockopen方法: php代码: <?php /*----------------------------------------------------------- *功能:使用PHP socke 向指定页面提交数据 *作者:果冻 说明:post($url, $data) * * $url = 'http://www
-
jQuery自动添加表单项的方法
本文实例讲述了jQuery自动添加表单项的方法.分享给大家供大家参考.具体如下: 这里实现通过点击按钮动态添加一个表单输入项 <script type="text/javascript" charset="utf-8"> $(function() { var fieldCount = 1; $("#addFieldButton").click(function() { fieldCount++; if(fieldCount <=
-
springboot中关于自动建表,无法更新字段的问题
目录 关于自动建表,无法更新字段问题 Springboot中的配置 除了create配置,还有以下几种 springbootjpa未自动建表问题记录 检查pom是否正确引入对应模块 检查application文件配置是否存在错误 关于自动建表,无法更新字段问题 Springboot中的配置 jpa: database-platform: org.hibernate.dialect.MySQL5InnoDBDialect database: MYSQL show-sql:
-
Spring Data Jpa 自动生成表结构的方法示例
想在部署的时候随应用的启动而初始化数据脚本,这不就是Spring Data Jpa中的自动生成表结构,听起来特别简单,不就是配置Hibernate的ddl-auto嘛,有什么好说的,是个人都知道.当初我也是这样认为,实际操作了一把,虽然表是创建成功了,但是字段注释,字符集以及数据库引擎都不对,没想到在这些细节上翻车了. 毕竟开翻的车还要自己扶起来,于是在这记录一下. 注:本文中使用的Spring Data Jpa版本为2.1.4.RELEASE 以MySQL为例,我这边举个例子: import
-
详解hibernate自动创建表的配置
详解hibernate自动创建表的配置 配置自动创建表: <prop key="hibernate.hbm2ddl.auto">update</prop>//首次创建项目时用,项目稳定后一般注释这里有4个值: update:表示自动根据model对象来更新表结构,启动hibernate时会自动检查数据库,如果缺少表,则自动建表:如果表里缺少列,则自动添加列. 还有其他的参数: create:启动hibernate时,自动删除原来的表,新建所有的表,所以每次启动后
-
SpringBoot+jpa配置如何根据实体类自动创建表
目录 jpa配置根据实体类自动创建表 1.配置文件application.properties 2.pom.xml引入包 3.编写实体类 4.运行项目 5.针对项目启动以后数据库并未生成数据库表问题 jpa根据Entry自动生成表 1.加入依赖 2.配置 application.yml 3. 创建Entity jpa配置根据实体类自动创建表 1.配置文件application.properties spring.datasource.url=jdbc:mysql://localhost:3306