SpringBoot整合数据库访问层的实战
目录
- 一、springboot整合使用JdbcTemplate
- 1.pom依赖
- 2.application.yml新增配置
- 3.建表sql
- 4.UserService
- 5.浏览器访问
- 二、整合mybatis框架查询
- 1.pom依赖
- 2.实体类UserEntity
- 3.UserMapper接口
- 4.UserService
- 5.app启动
- 三、整合mybatis框架插入
- 1.UserMapper添加insertUser
- 2.UserService添加insertUserMybatis
一、springboot整合使用JdbcTemplate
1.pom依赖
        <!--SpringBoot整合jdbc模板框架-->
        <dependency>
            <groupId>org.springframework.boot</groupId>
            <artifactId>spring-boot-starter-jdbc</artifactId>
        </dependency>
        <!--SpringBoot整合mysql驱动类-->
        <dependency>
            <groupId>mysql</groupId>
            <artifactId>mysql-connector-java</artifactId>
            <version>5.1.21</version>
        </dependency>
2.application.yml新增配置
spring:
  datasource:
    url: jdbc:mysql://localhost:3306/test
    username: root
    password: root
    driver-class-name: com.mysql.jdbc.Driver
3.建表sql
CREATE TABLE `users` (
  `id` int(11) NOT NULL AUTO_INCREMENT,
  `name` varchar(32) NOT NULL COMMENT '用户名称',
  `age` int(11) DEFAULT NULL,
  PRIMARY KEY (`id`)
) ENGINE=InnoDB AUTO_INCREMENT=3 DEFAULT CHARSET=utf8;
4.UserService
@RestController
public class UserService {

    @Autowired
    private JdbcTemplate jdbcTemplate;

    @RequestMapping("/insertUser")
    public String insertUser(String name,Integer age){
        int update = jdbcTemplate.update("insert into users values(null,?,?);", name, age);
        return update > 0 ? "success" : "false";
    }
}
5.浏览器访问
http://127.0.0.1:8080/insertUser?name=你好&age=21


二、整合mybatis框架查询
1.pom依赖
    <!-- springboot 整合mybatis -->
    <dependency>
        <groupId>org.mybatis.spring.boot</groupId>
        <artifactId>mybatis-spring-boot-starter</artifactId>
        <version>1.1.1</version>
    </dependency>
2.实体类UserEntity
public class UserEntity {
    private String userName;
    private Integer age;
    private Integer id;
	//GET...SET...省略
}
3.UserMapper接口
public interface UserMapper {
    @Select("select id as id,name as userName,age as age from users where id = #{id};")
    UserEntity selectByUserId(@Param("id") Integer id);
}
4.UserService
@RestController
public class UserService {
    @Autowired
    private UserMapper userMapper;
    @RequestMapping("/mybatisFindById")
    public UserEntity mybatisFindById(Integer id){
        return userMapper.selectByUserId(id);
    }
}
5.app启动
注意:这里需要加注解@MapperScan("com.sjyl.mapper")来告诉spring接口mapper的扫包范围
@SpringBootApplication
@MapperScan("com.sjyl.mapper")
public class App {
    public static void main(String[] args) {
        SpringApplication.run(App.class);
    }
}
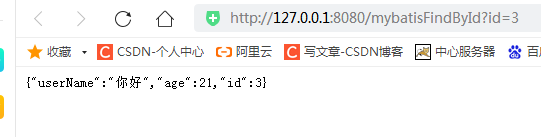
测试连接:http://127.0.0.1:8080/mybatisFindById?id=3
三、整合mybatis框架插入
1.UserMapper添加insertUser
public interface UserMapper {

    @Insert("Insert into users values (null,#{userName},#{age});")
    int insertUser(@Param("userName") String userName,@Param("age") Integer age);

    @Select("select id as id,name as userName,age as age from users where id = #{id};")
    UserEntity selectByUserId(@Param("id") Integer id);
}
2.UserService添加insertUserMybatis
@RestController
public class UserService {
    @Autowired
    private UserMapper userMapper;

    @RequestMapping("/mybatisFindById")
    public UserEntity mybatisFindById(Integer id){
        return userMapper.selectByUserId(id);
    }

    @RequestMapping("/insertUserMybatis")
    public String insertUserMybatis(String userName,Integer age){
        int insert = userMapper.insertUser(userName,age);
        return insert > 0 ? "success" : "false";
    }
}
测试连接:http://127.0.0.1:8080/insertUserMybatis?userName=%E5%BC%A0%E4%B8%89&age=21

到此这篇关于SpringBoot整合数据库访问层的实战的文章就介绍到这了,更多相关SpringBoot 数据库访问层内容请搜索我们以前的文章或继续浏览下面的相关文章希望大家以后多多支持我们!
相关推荐
-
Spring Boot集成MyBatis访问数据库的方法
基于spring boot开发的微服务应用,与MyBatis如何集成? 集成方法 可行的方法有: 1.基于XML或者Java Config,构建必需的对象,配置MyBatis. 2.使用MyBatis官方提供的组件,实现MyBatis的集成. 方法一 建议参考如下文章,完成集成的验证. MyBatis学习 之 一.MyBatis简介与配置MyBatis+Spring+MySql 基于Spring + Spring MVC + Mybatis 高性能web构建 spring与mybatis三种整合
-

Spring boot基于JPA访问MySQL数据库的实现
本文展示如何通过JPA访问MySQL数据库. JPA全称Java Persistence API,即Java持久化API,它为Java开发人员提供了一种对象/关系映射工具来管理Java应用中的关系数据,结合其他ORM的使用,能达到简化开发流程的目的,使开发者能够专注于实现自己的业务逻辑上. Spring boot结合Jpa 能够简化创建 JPA 数据访问层和跨存储的持久层功能,用户的持久层Dao接口只需要继承定义好的接口,无需再写实现类,就可以实现对象的CRUD操作以及分页排序等功能. 环境要求
-
Spring boot 使用JdbcTemplate访问数据库
SpringBoot 是为了简化 Spring 应用的创建.运行.调试.部署等一系列问题而诞生的产物, 自动装配的特性让我们可以更好的关注业务本身而不是外部的XML配置,我们只需遵循规范,引入相关的依赖就可以轻易的搭建出一个 WEB 工程 Spring Framework 对数据库的操作在 JDBC 上面做了深层次的封装,通过 依赖注入 功能,可以将 DataSource 注册到 JdbcTemplate 之中,使我们可以轻易的完成对象关系映射,并有助于规避常见的错误,在 SpringBoot
-
Spring boot中使用Spring-data-jpa方便快捷的访问数据库(推荐)
什么是JPA JPA(Java Persistence API)是Sun官方提出的Java持久化规范.它为Java开发人员提供了一种对象/关联映射工具来管理Java应用中的关系数据.他的出现主要是为了简化现有的持久化开发工作和整合ORM技术 Spring Data JPA 是 Spring 基于 ORM 框架.JPA 规范的基础上封装的一套JPA应用框架,可使开发者用极简的代码即可实现对数据的访问和操作.它提供了包括增删改查等在内的常用功能,且易于扩展!学习并使用 Spring Data JPA
-
SpringBoot使用JdbcTemplate访问操作数据库基本用法
目录 一.建一个rumenz_springboot库 二.加入pom的依赖 三.SpringBoot配置文件 四.创建User实体类 五.Service接口 六.Service接口实现类 七.Controller测试 八.总结 Spring对数据库的操作在jdbc上s面做了深层次的封装,使用spring的注入功能,可以把DataSource注册到JdbcTemplate之中. JdbcTemplate在Spring-jdbc包下面,还需要Spring-tx包支持,里面包含事务和异常控制. 一.建
-
SpringBoot整合数据库访问层的实战
目录 一.springboot整合使用JdbcTemplate 1.pom依赖 2.application.yml新增配置 3.建表sql 4.UserService 5.浏览器访问 二.整合mybatis框架查询 1.pom依赖 2.实体类UserEntity 3.UserMapper接口 4.UserService 5.app启动 三.整合mybatis框架插入 1.UserMapper添加insertUser 2.UserService添加insertUserMybatis 一.sprin
-
springboot整合JPA访问Mysql的实现方法
1.代码实现: 添加依赖 <dependency> <groupId>org.springframework.boot</groupId> <artifactId>spring-boot-starter</artifactId> </dependency> <dependency> <groupId>org
-
springboot整合log4j的踩坑实战记录
目录 1.依赖添加 1.1.添加依赖 1.2.剔除依赖 2.配置日志 2.1.日志打印记录 2.2.指定配置文件 补充:log4j调优和注意事项 总结 1.依赖添加 1.1.添加依赖 需要引入 log4j 的依赖支持,推荐自己确定使用的版本. <dependency> <groupId>org.apache.logging.log4j</groupId> <artifactId>log4j-to-slf4j</artifactId> <ve
-
SpringBoot快速整合Mybatis、MybatisPlus(代码生成器)实现数据库访问功能
1. 创建SpringBoot项目 1.1 引入依赖 pom.xml <?xml version="1.0" encoding="UTF-8"?> <project xmlns="http://maven.apache.org/POM/4.0.0" xmlns:xsi="http://www.w3.org/2001/XMLSchema-instance" xsi:schemaLocation="ht
-
ASP.NET对SQLServer的通用数据库访问类
本文模仿实现数据库访问的通用类,代码清晰,而且很实用,包括了对数据库的所有的常用的操作. /// <summary> /// 数据库访问通用类 /// </summary> public class SqlHelper { private string connectionString; /// <summary> /// 设定数据库访问字符串 /// </summary> public string ConnectionString { set { con
-
springboot整合过滤器实战步骤
目录 一.普通的接口访问 二.增加一个过滤器 1.自定义过滤器 2.注册到容器 3.演示一下效果: 三.增加两个过滤器 下面先建立一个MVC的基本请求接口,如下: 一.普通的接口访问 如上,先新增一个testController. 先用postman测试一下通不通. 结果是通的,准备工作完成. 二.增加一个过滤器 下面增加一个过滤器来实现一个接口拦截并处理token校验的模拟. 简单处理,有如下两个步骤. 1.自定义过滤器 package com.example.demo_filter_inte
-
SpringBoot整合RabbitMQ实战教程附死信交换机
目录 前言 环境 配置 配置文件 业务消费者 死信消费者 测试 前言 使用springboot,实现以下功能,有两个队列1.2,往里面发送消息,如果处理失败发生异常,可以重试3次,重试3次均失败,那么就将消息发送到死信队列进行统一处理,例如记录数据库.报警等完整demo项目代码https://gitee.com/daenmax/rabbit-mq-demo 环境 Windows10,IDEA,otp_win64_25.0,rabbitmq-server-3.10.41.双击C:\Program
-
SpringBoot 整合 Spring-Session 实现分布式会话项目实战
目录 一.配置及开发 二.测试 三.Spring-Session 的缺点 文章参考: Spring 提供了处理分布式会话的解决方案:Spring-Session.Spring-Session 提供了对Redis.MongoDB.MySQL 等常用存储的支持,Spring-Session 提供与 HttpSession 的透明整合,这意味着开发人员可以使用 Spring-Session 支持的实现方式,切换 HttpSession 至 Spring-Session.本文采用 Redis 作为第三方
-
SpringBoot 整合Redis 数据库的方法
Redis简介 Redis(官网: https://redis.io )是一个基于内存的日志型可持久化的缓存数据库,保存形式为key-value格式,Redis完全免费开源,它使用ANSI C语言编写.与其他的key - value缓存产品一样,Redis具有以下三个特点. • Redis支持数据的持久化,可以将内存中的数据保存在磁盘中,重启的时候可以再次加载进行使用: • Redis不仅支持简单的key-value类型数据,同时还提供字符串.链表.集合.有序集合和哈希等数据结构的存储: • R
-
SpringBoot整合Mybatis实现高德地图定位并将数据存入数据库的步骤详解
第一步配置yml文件 server: port: 8080 spring: datasource: username: root password: 123456 url: jdbc:mysql://localhost:3306/spring?useUnicode=true&characterEncoding=utf-8&useSSL=true&serverTimezone=UTC driver-class-name: com.mysql.cj.jdbc.Driver thymel