SpringSecurity页面授权与登录验证实现(内存取值与数据库取值)
目录
- SpringSecurity?
- 一.导入依赖
- 二.配置yml文件
- 三.代码部分
- DAO层(注意@Repository与@Mapper注解)
- Service层(注意@Service注解)
- Controller层(注意@Controller注解)
- POJO
- Utils
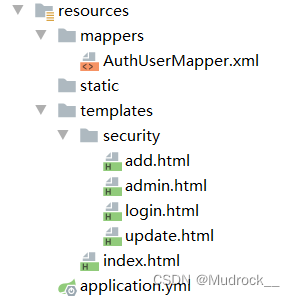
- 资源目录结构
- 运行效果
SpringSecurity?
Spring Security是一个能够为基于Spring的企业应用系统提供声明式的安全访问控制解决方案的安全框架。它提供了一组可以在Spring应用上下文中配置的Bean,充分利用了Spring IoC,DI(控制反转Inversion of Control ,DI:Dependency Injection 依赖注入)和AOP(面向切面编程)功能,为应用系统提供声明式的安全访问控制功能,减少了为企业系统安全控制编写大量重复代码的工作
绝大部分对于项目的说明写在代码注释中
此博客中的项目基于SpringBoot(2.6.7)整合Mybatis项目创建,其中大部分依赖版本依据SpringBoot(2.6.7)而定,小部分官方未提供版本建议需自行指定
一.导入依赖
    <dependencies>
        <!--security-->
        <dependency>
            <groupId>org.springframework.boot</groupId>
            <artifactId>spring-boot-starter-security</artifactId>
        </dependency>
        <!--thymeleaf-->
        <dependency>
            <groupId>org.springframework.boot</groupId>
            <artifactId>spring-boot-starter-thymeleaf</artifactId>
        </dependency>
        <dependency>
            <groupId>org.thymeleaf.extras</groupId>
            <artifactId>thymeleaf-extras-springsecurity5</artifactId>
        </dependency>

        <!--web-->
        <dependency>
            <groupId>org.springframework.boot</groupId>
            <artifactId>spring-boot-starter-web</artifactId>
        </dependency>

        <!--lombok-->
        <dependency>
            <groupId>org.projectlombok</groupId>
            <artifactId>lombok</artifactId>
            <optional>true</optional>
        </dependency>

        <!--junit-->
        <dependency>
            <groupId>junit</groupId>
            <artifactId>junit</artifactId>
        </dependency>

        <!--mybatis-->
        <dependency>
            <groupId>org.mybatis.spring.boot</groupId>
            <artifactId>mybatis-spring-boot-starter</artifactId>
            <version>2.2.2</version>
        </dependency>
        <!--mysql-->
        <dependency>
            <groupId>mysql</groupId>
            <artifactId>mysql-connector-java</artifactId>
        </dependency>

        <!--druid-->
        <dependency>
            <groupId>com.alibaba</groupId>
            <artifactId>druid-spring-boot-starter</artifactId>
            <version>1.1.10</version>
        </dependency>
        <!--log4j-->
        <dependency>
            <groupId>log4j</groupId>
            <artifactId>log4j</artifactId>
            <version>1.2.17</version>
        </dependency>

        <!--devtools-->
        <dependency>
            <groupId>org.springframework.boot</groupId>
            <artifactId>spring-boot-devtools</artifactId>
        </dependency>
    </dependencies>
二.配置yml文件
server:
  port: 8080

mybatis:
  mapper-locations: classpath:mappers/*.xml
  configuration:
    map-underscore-to-camel-case: true

spring:
  datasource:
    driver-class-name: com.mysql.cj.jdbc.Driver
    url: jdbc:mysql://localhost:3306/mybatis?useSSL=false&useUnicode=true&characterEncoding=UTF-8&serverTimezone=Asia/Shanghai
    username: root
    password: 123456789
    #德鲁伊数据源
    type: com.alibaba.druid.pool.DruidDataSource
    druid:
      #SpringBoot默认是不注入 需要自己绑定至bean(使用java配置bean时 因为springboot内置了servlet容器 所以无web.xml 需要@Bean将配置注入)
      #druid数据源专有配置
      initialSize: 5
      minIdle: 5
      maxActive: 20
      maxWait: 60000
      timeBetweenEvictionRunsMillis: 60000
      minEvictableIdleTimeMillis: 300000
      validationQuery: SELECT 1 FROM DUAL
      testWhileIdle: true
      testOnBorrow: false
      testOnReturn: false
      poolPreparedStatements: true
      #配置监控统计拦截的filters。stat:监控统计、wall:防御sql注入、log4j:日志记录
      filters: stat,wall,log4j
      maxPoolPreparedStatementPerConnectionSize: 20
      useGlobalDataSourceStat: true
      connectionProperties: druid.stat.mergeSql=true;druid.stat.slowSqlMillis=500
      #配置 DruidStatFilter
      web-stat-filter:
        enabled: true
        url-pattern: /*
        exclusions: /druid/*,*.js,*.css,*.gif,*.jpg,*.bmp,*.png,*.ico
      #配置 DruidStatViewServlet
      stat-view-servlet:
        #访问德鲁伊监控页面的地址
        url-pattern: /druid/*
        #IP白名单 没有配置或者为空 则允许所有访问
        allow: 127.0.0.1
        #IP黑名单 若白名单也存在 则优先使用
#        deny: ip地址
        #禁用重置按钮
#        reset-enable: false
        #登录德鲁伊监控页面所用的用户名与密码
        login-username: root
        login-password: 123456
  #关闭thymeleaf缓存 修改代码后无需重启即可更新
  thymeleaf:
    cache: false
  #security认证设置 配置类中若存在设置 则yml文件不生效
#  security:
#    user:
#      name:
#      password:
#      roles:
三.代码部分
DAO层(注意@Repository与@Mapper注解)
@Repository
@Mapper
public interface AuthUserMapper {
    AuthUser queryByUserName(String username);
    List<AuthRole> queryRoleByUserId(int id);
}
<?xml version="1.0" encoding="UTF-8" ?>
<!DOCTYPE mapper
        PUBLIC "-//mybatis.org//DTD Mapper 3.0//EN"
        "http://mybatis.org/dtd/mybatis-3-mapper.dtd">
<mapper namespace="cn.alan.springboot.DAO.AuthUserMapper">
    <select id="queryByUserName" parameterType="String" resultType="cn.alan.springboot.POJO.AuthUser">
        select *
        from mybatis.auth_user
        where username = #{username};
    </select>

    <select id="queryRoleByUserId" parameterType="int" resultType="cn.alan.springboot.POJO.AuthRole">
        select *
        from mybatis.auth_role
        where user_id = #{id};
    </select>
</mapper>
Service层(注意@Service注解)
Service类需要实现UserDetailsService接口
@Service
public class AuthUserService implements UserDetailsService {
    @Autowired
    AuthUserMapper authUserMapper;

    //根据用户名从数据库获取用户信息 密码验证由SpringSecutit进行
    @Override
    public UserDetails loadUserByUsername(String username) throws UsernameNotFoundException {

        AuthUser user = authUserMapper.queryByUserName(username);

        if (user == null) {
            throw new UsernameNotFoundException("unknown username");//抛出异常
        }

        List<AuthRole> authRole = authUserMapper.queryRoleByUserId(user.getId());
        user.setAuthRoles(authRole);

        return user;

    }
}
Controller层(注意@Controller注解)
@Controller//springsecurity controller类
public class RouterController {
    @Autowired
    cn.alan.springboot.DAO.AuthUserMapper authUserMapper;

    @RequestMapping({"/", "/index"})
    public String toIndex(){
        return "index";
    }

    @RequestMapping("/toLogin")
    public String toLogin(){
        return "security/login";
    }

    @RequestMapping("/add")
    public String toAdd(){
        return "security/add";
    }

    @RequestMapping("/update")
    public String toUpdate(){
        return "security/update";
    }

    @RequestMapping("/admin")
    public String toAdmin(){
        return "security/admin";
    }

}
POJO
User实体类需要实现UserDetails接口
@Data
@Getter
@Setter
//必须实现所有UserDetails方法 必须有与方法对应的变量 数据库中是否有对应字段不影响验证
public class AuthUser implements UserDetails {
    private int id;
    private String username;
    private String password;
    private List<AuthRole> AuthRoles;
    private int accountNonExpired;
    private int accountNonLocked;
    private int credentialsNonExpired;
    private int enabled;

    //获取用户所有角色信息
    @Override
    public Collection<? extends GrantedAuthority> getAuthorities() {
        List<SimpleGrantedAuthority> authorities = new ArrayList<>();
        for(AuthRole role : AuthRoles){
            //为所有角色字段的数据加上 ROLE_ 前缀
            //无此前缀无法被security识别为角色
            //当然 可以在数据库中直接添加前缀
            authorities.add(new SimpleGrantedAuthority("ROLE_" + role.getUserRole()));
        }
        return authorities;
    }

    //判断账户是否过期
    @Override
    public boolean isAccountNonExpired() {
        return accountNonExpired==0;
    }

    //判断账户是否锁定
    @Override
    public boolean isAccountNonLocked() {
        return accountNonLocked==0;
    }

    //判断密码是否过期
    @Override
    public boolean isCredentialsNonExpired() {
        return credentialsNonExpired==0;
    }

    //判断账户是否可用
    @Override
    public boolean isEnabled() {
        return enabled==0;
    }
}
@Data
@Getter
@Setter
public class AuthRole {
    int userId;
    String userRole;
}
Config
Config类需要继承WebSecurityConfigurerAdapter类,且需要添加一个加密Bean
package cn.alan.springboot.Config;

import cn.alan.springboot.Service.AuthUserService;
import org.springframework.beans.factory.annotation.Autowired;
import org.springframework.context.annotation.Bean;
import org.springframework.security.config.annotation.authentication.builders.AuthenticationManagerBuilder;
import org.springframework.security.config.annotation.web.builders.HttpSecurity;
import org.springframework.security.config.annotation.web.configuration.EnableWebSecurity;
import org.springframework.security.config.annotation.web.configuration.WebSecurityConfigurerAdapter;
import org.springframework.security.crypto.bcrypt.BCryptPasswordEncoder;
import org.springframework.security.crypto.password.PasswordEncoder;

@Configuration
@EnableWebSecurity//开启springsecurity
//继承WebSecurityConfigurerAdapter类
public class SecurityConfig extends WebSecurityConfigurerAdapter {

    //授权
    @Override
    protected void configure(HttpSecurity http) throws Exception {
        //规则
        http.authorizeHttpRequests()
                .antMatchers("/").permitAll()//该页面允许所有人访问
                .antMatchers("/add").hasRole("add")//访问/level1/* 需要权限1
                .antMatchers("/update").hasRole("update")//访问/level2/* 需要权限2
                .antMatchers("/admin").hasRole("admin");//访问/level3/* 需要权限3

        //开启注销功能(默认使用security提供的注销页面)
            //.logoutSuccessUrl() 注销成功后返回的页面
        http.logout().logoutSuccessUrl("/");

        //没有权限会默认走登录页面(默认使用security提供的登陆页面)
            //.loginPage() 自定义登陆页面
            //.loginProcessingUrl() 设置实际处理提交的页面 设置后将登陆页面中表单的action设置为相同url
            //.usernameParameter() 表单中username输入框的name属性 默认为username
            //.passwordParameter() 表单中password输入框的name属性 默认为password
        http.formLogin().loginPage("/toLogin");

        //注:自定义登陆页面后security提供的登录页面将失效 同时security提供的注销询问页面也将失效 但注销功能任然可用

        //开启"remember me"功能
            //.rememberMeParameter() 表单中rememberme单选框的name属性 默认为remember-me
        http.rememberMe();

        //关闭CSRF防护
        //自定义登陆页面后 不关闭此选项将无法注销
        http.csrf().disable();
    }

    @Autowired
    AuthUserService authUserService;
    //认证
    @Override
    protected void configure(AuthenticationManagerBuilder auth) throws Exception {
        auth.userDetailsService(authUserService);
        //从内存中取值 在新版本中需要对密码进行加密 否则无法登陆 .passwordEncoder(new BCryptPasswordEncoder())
//        auth.inMemoryAuthentication().passwordEncoder(new BCryptPasswordEncoder())
//                .withUser("one").password(new BCryptPasswordEncoder().encode("123456")).roles("vip1")
//                .and()//该方法中使用链式写法配置用户信息 用户之间需要用.and()连接
//                .withUser("two").password(new BCryptPasswordEncoder().encode("123456")).roles("vip1","vip2")
//                .and()
//                .withUser("three").password(new BCryptPasswordEncoder().encode("123456")).roles("vip1","vip2","vip3");
    }

    //加密 前端的明文密码会在被加密后与后端数据库中的密文进行比对
    //SpringSecurity默认开启加密 数据库中的密码若不符合密文格式 认证不会通过
    //记得@Bean
    @Bean
    PasswordEncoder passwordEncoder() {
        return new BCryptPasswordEncoder();
    }
}
Utils
加密工具类,此处采用BCryptPasswordEncoder进行加密
public class PasswordEncoderUtils {
    private final PasswordEncoder passwordEncoder = new BCryptPasswordEncoder();

    @Test
    public void encode() {
        String password = "123";
        String encodedPassword = passwordEncoder.encode(password);

        System.out.println("password: " + password);
        System.out.println("encodedPassword: " + encodedPassword);
    }
}
数据库


资源目录结构
index.html
<!DOCTYPE html>
<html lang="en"
      xmlns:th="http://www.thymeleaf.org"
      xmlns:sec="http://www.thymeleaf.org/extras/spring-security"
>
<head>
    <meta charset="UTF-8">
    <title>Title</title>
</head>
<body>
<center>
    <h1>index</h1>
</center>
<hr>
<center>
    <div sec:authorize="!isAuthenticated()"><!--未认证时显示-->
        <a th:href="@{/toLogin}" rel="external nofollow" ><h1>Login</h1></a>
    </div>
    <div sec:authorize="isAuthenticated()"><!--认证后时显示-->
        <!--注销-->
        <!--security自带logout页面-->
        <a th:href="@{/logout}" rel="external nofollow" >
            <h1>Logout</h1>
        </a>
    </div>
    <div sec:authorize="hasRole('add')"><!--拥有add权限时显示-->
        <a th:href="@{/add}" rel="external nofollow" ><h1>add</h1></a>
    </div>
    <div sec:authorize="hasRole('update')"><!--拥有update权限时显示-->
        <a th:href="@{/update}" rel="external nofollow" ><h1>update</h1></a>
    </div>
    <div sec:authorize="hasRole('admin')"><!--拥有admin权限时显示-->
        <a th:href="@{/admin}" rel="external nofollow" ><h1>admin</h1></a>
    </div>
    <hr>
    <div sec:authorize="isAuthenticated()"><!--认证后时显示-->
        <strong>用户名:</strong><strong sec:authentication="name"></strong>
        <br>
        <strong>角色:</strong><span sec:authentication="principal.authorities"></span>
    </div>

</center>
</body>
</html>
login.html
<!DOCTYPE html>
<html lang="en" xmlns:th="http://www.thymeleaf.org">
<head>
    <meta charset="UTF-8">
    <meta name="viewport" content="width=device-width, initial-scale=1, maximum-scale=1">
    <title>登录</title>
</head>
<body>
<div style="text-align: center">
    <h1>Login</h1>
</div>
<div style="text-align: center">
    <form th:action="@{/toLogin}" method="post">
        <strong>Username</strong>
        <br>
        <!--账户与密码的name在security中默认值为username与password-->
        <!--若需自定义 可在security的config类中自定义-->
        <input type="text" name="username">
        <br>
        <br>
        <strong>Password</strong>
        <br>
        <input type="password" name="password">
        <br>
        <br>
        <div>
            <input type="checkbox" name="remember-me"><strong>remember me</strong>
        </div>
        <br>
        <br>
        <!--注意type需为submit 勿错写为button-->
        <input type="submit" value="Submit">
    </form>
</div>

</body>
</html>
add.html(update.html、admin.html与此大同小异,不赘述)
<!DOCTYPE html>
<html lang="en">
<head>
    <meta charset="UTF-8">
    <title>Title</title>
</head>
<body>
<div style="text-align: center">
    <h1>add</h1>
</div>
</body>
</html>
运行效果
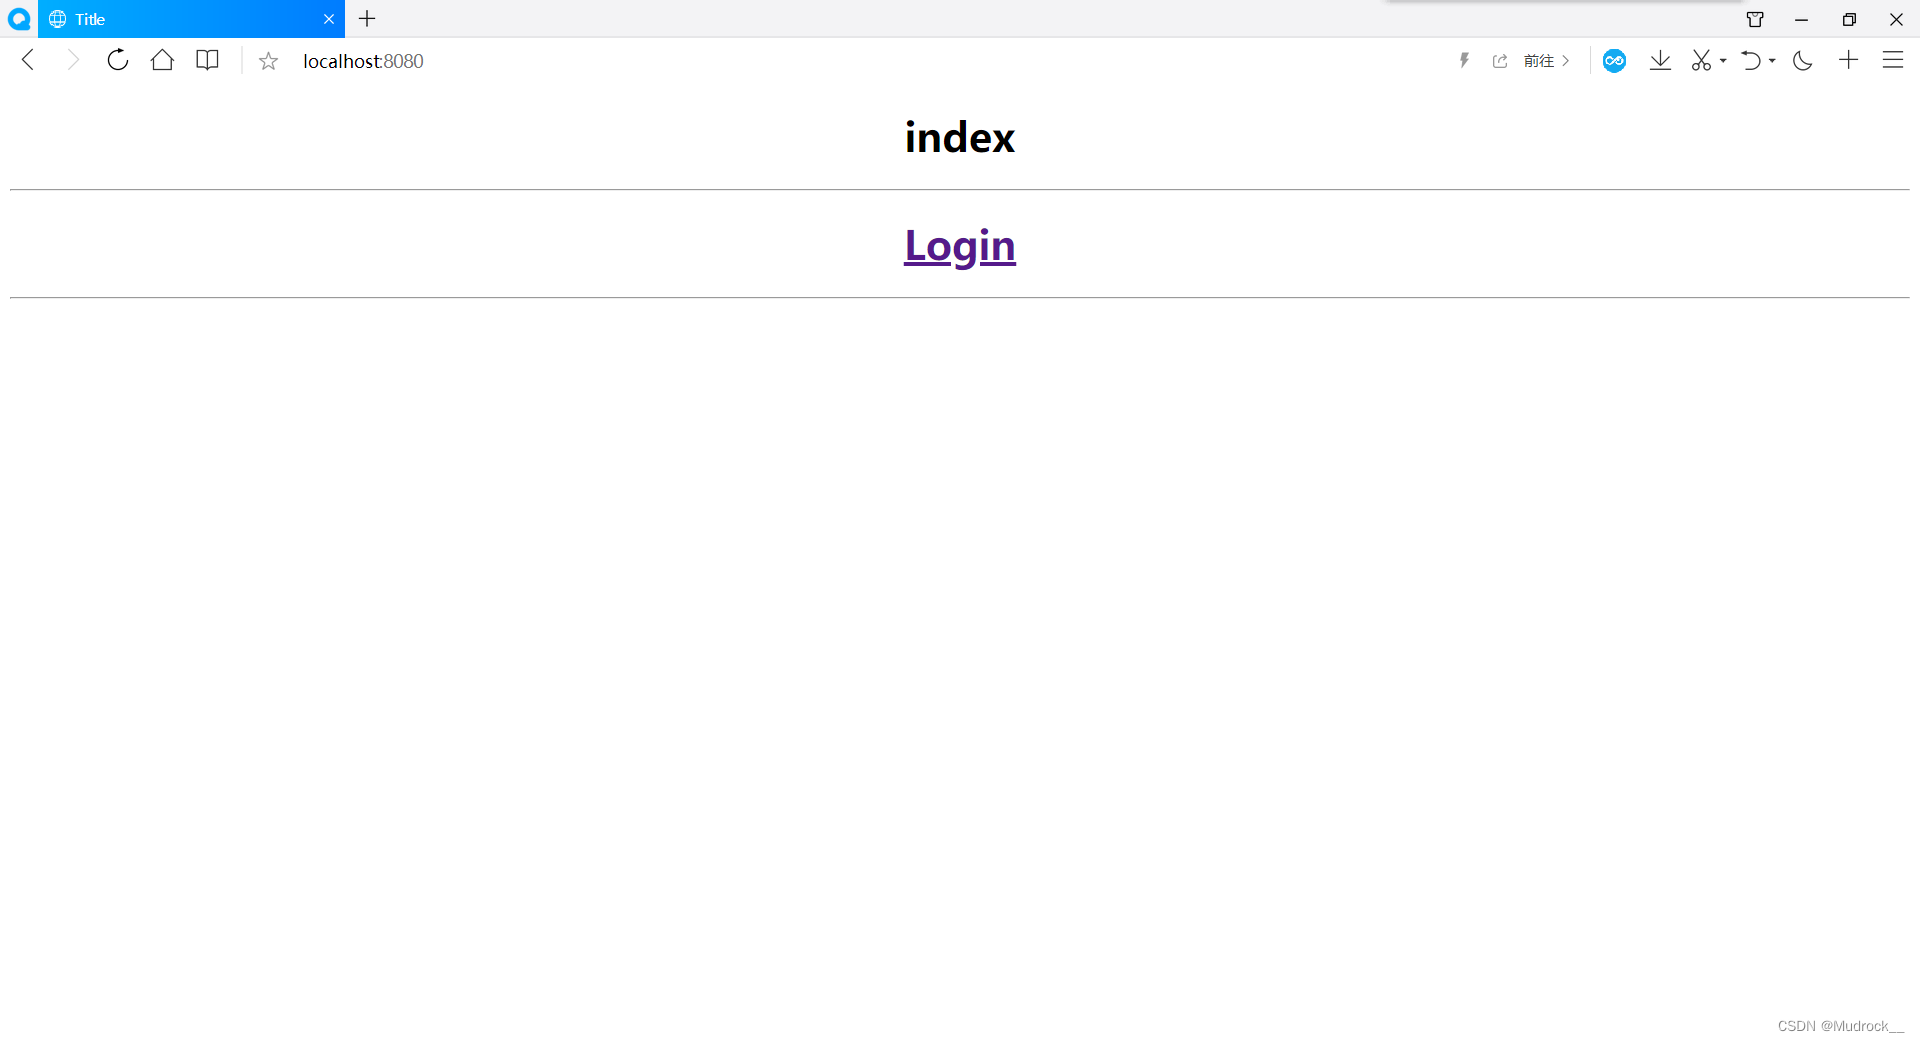
访问localhost:8080进入首页,点击登录按钮进入登录页面
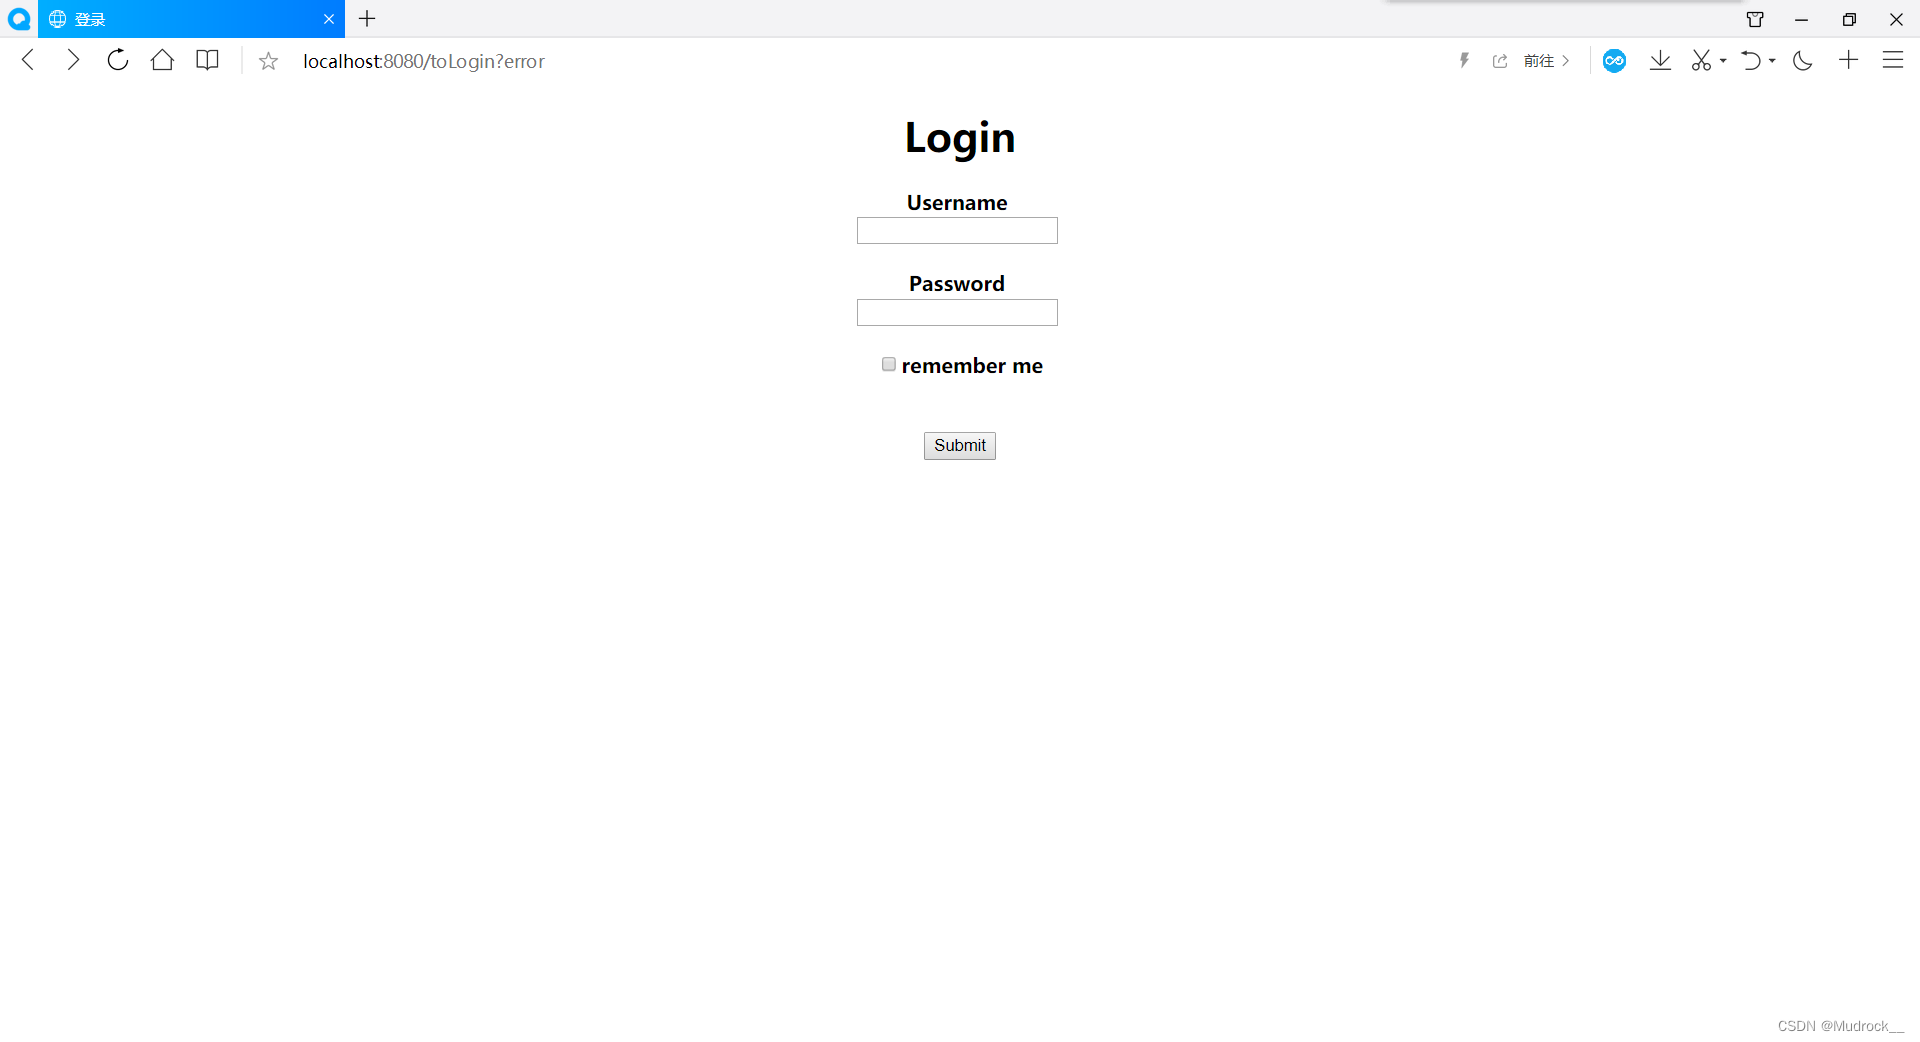
输入数据库中的账户密码(未加密),点击提交按钮进行登录
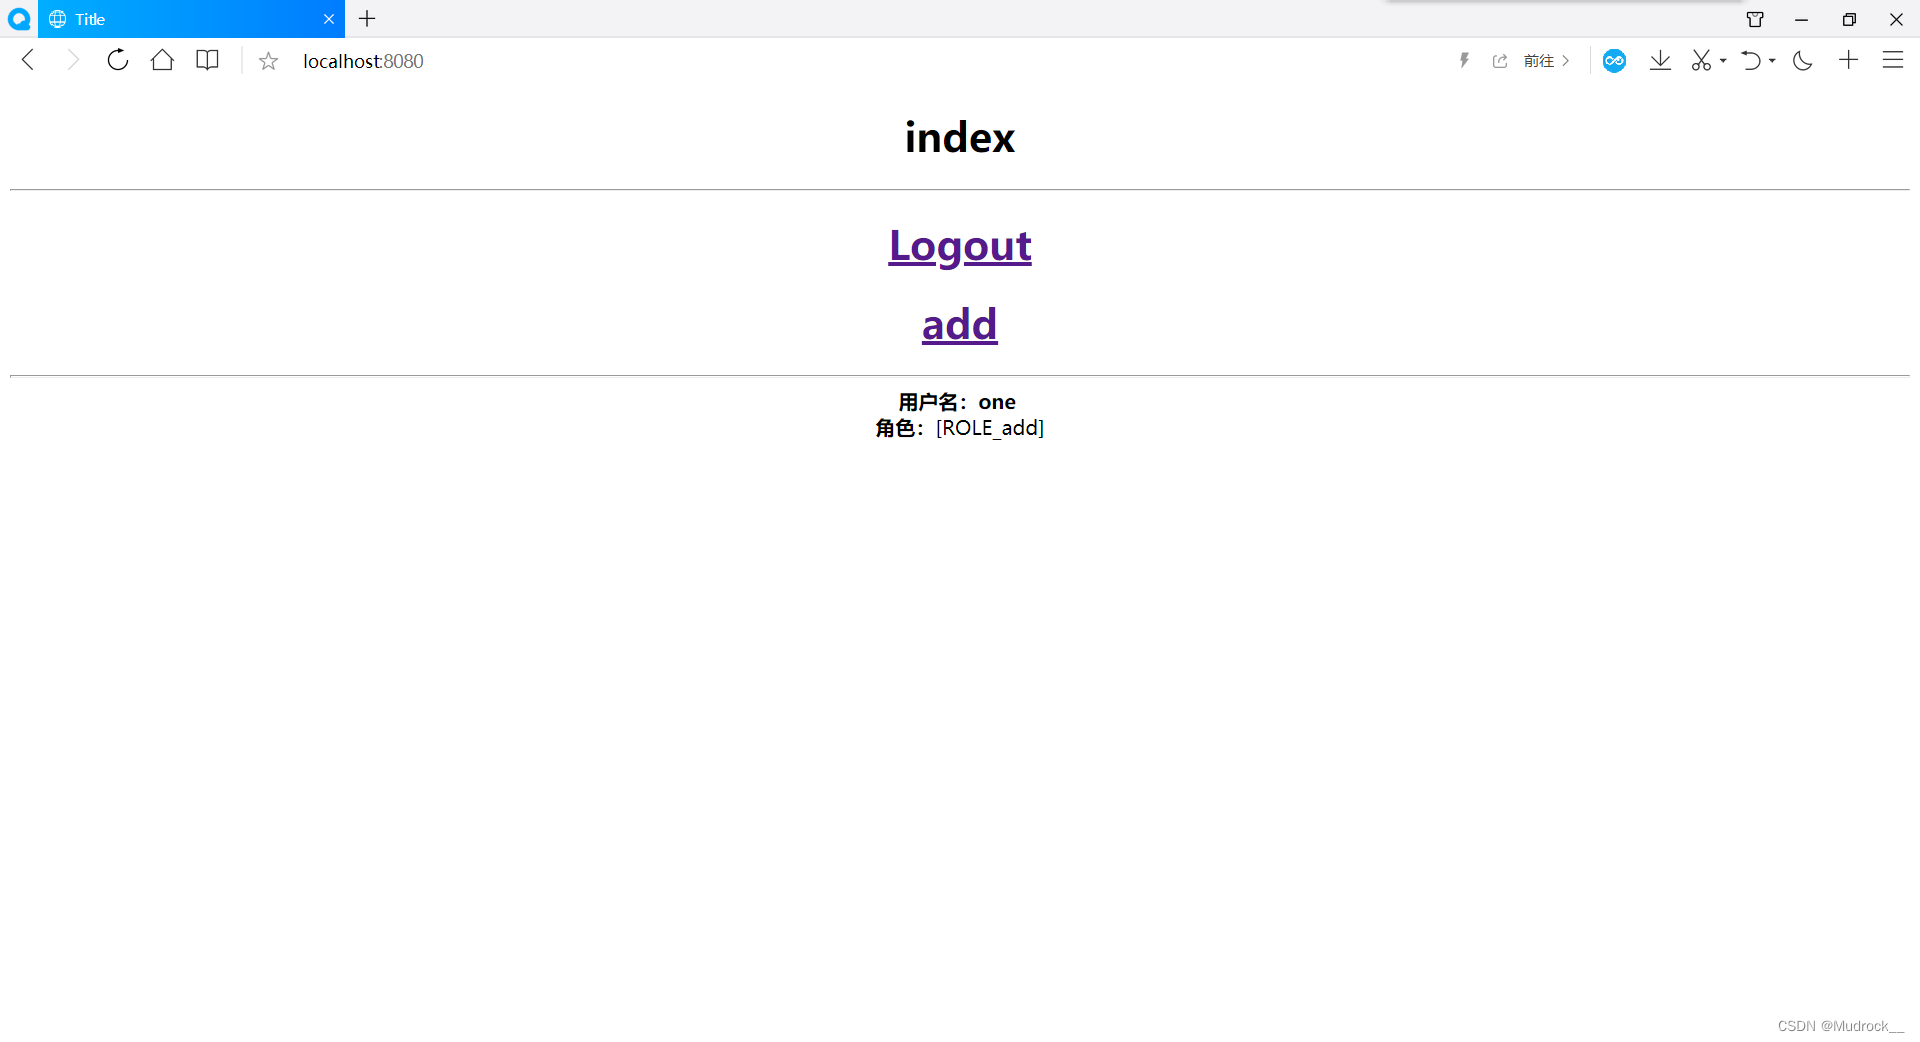
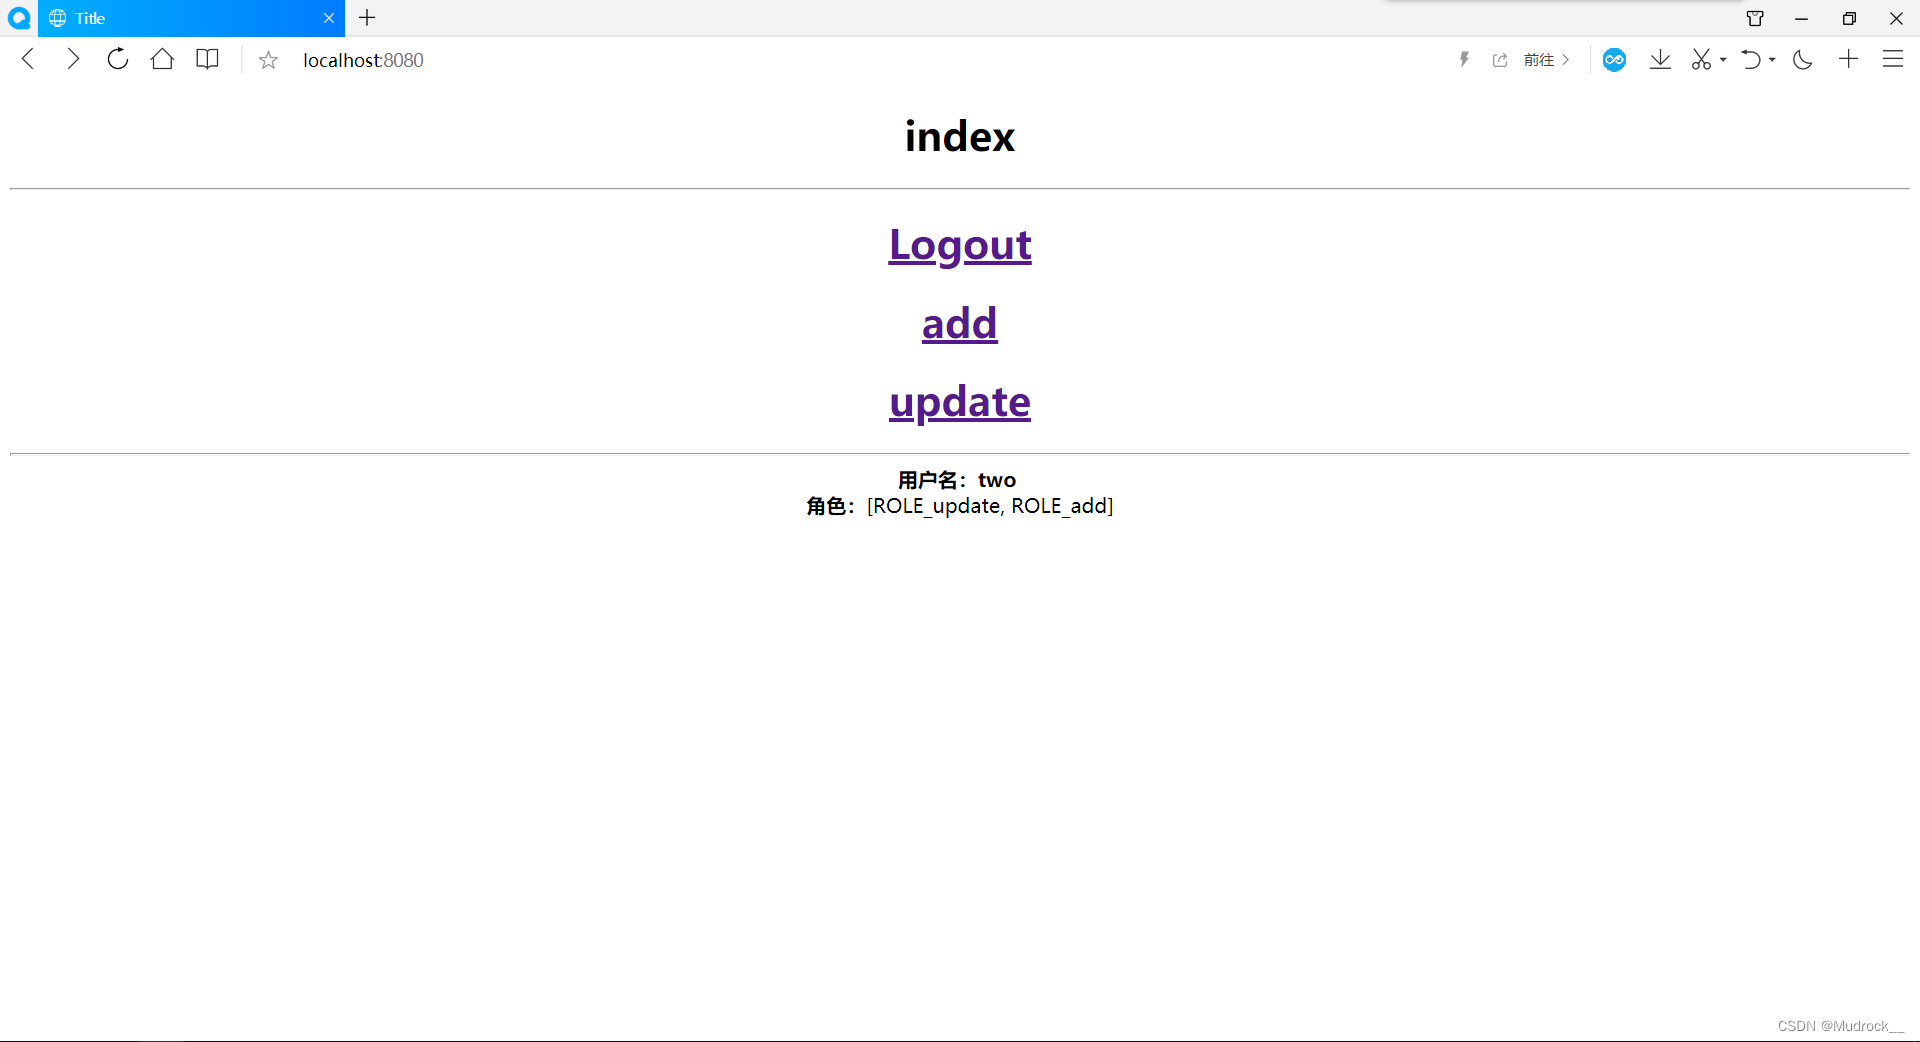
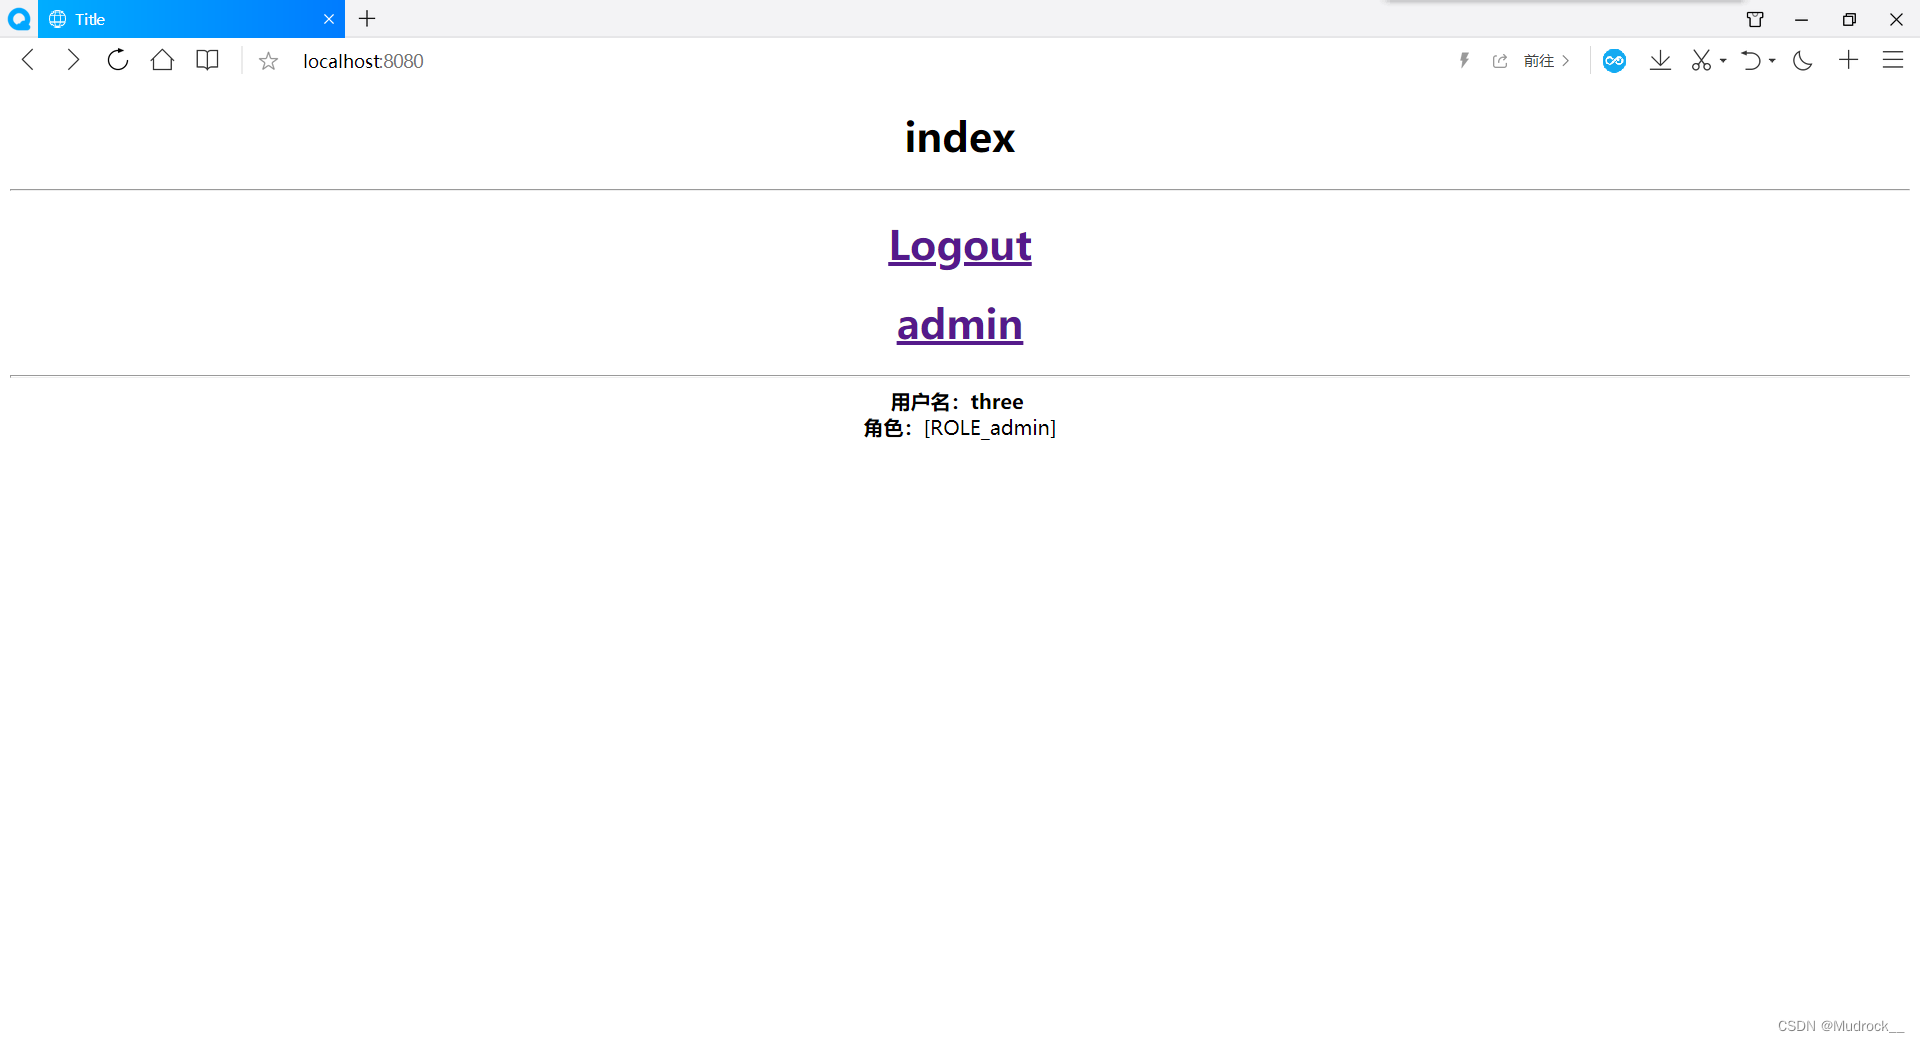
不同的账户拥有的角色不同,首页显示的内容也不尽相同。可点击注销按钮进行注销
注销后返回首页

至此,页面授权与登录认证(数据库取值)均完成。到此这篇关于SpringSecurity页面授权与登录验证实现(内存取值与数据库取值)的文章就介绍到这了,更多相关SpringSecurity页面授权与登录验证内容请搜索我们以前的文章或继续浏览下面的相关文章希望大家以后多多支持我们!

