pygame游戏之旅 按钮上添加文字的方法
本文为大家分享了pygame游戏之旅的第11篇,供大家参考,具体内容如下
定义一个button函数,将文字,颜色等作为参数。
def button (msg, x, y, w, h, ic, ac):
 mouse =pygame.mouse.get_pos()
 if x + w > mouse[0] > x and y + h > mouse[1] > y:
 pygame.draw.rect(gameDisplay, ac, (x,y,w,h))
 else:
 pygame.draw.rect(gameDisplay, ic, (x,y,w,h))
 smallText = pygame.font.Font("freesansbold.ttf", 20)
 textSurf, textRect = text_objects(msg, smallText)
 textRect.center = ( (x+(w/2)), (y+(h/2)))
 gameDisplay.blit(textSurf, textRect)
全部代码为:
import pygame
import time
import random

pygame.init()

white = (255,255,255)
black = (0,0,0)
gray = (128,128,128)
red = (200,0,0)
green = (0,200,0)
bright_red = (255,0,0)
bright_green = (0,255,0)
blue = (0,0,255)

car_width = 100

display_width = 800
display_height = 600

gameDisplay = pygame.display.set_mode( (display_width,display_height) )
pygame.display.set_caption('A bit Racey')
clock = pygame.time.Clock()

carImg = pygame.image.load('car.png')

def things_dodged(count):
 font = pygame.font.SysFont(None, 25)
 text = font.render("Dodged:"+str(count), True, black)
 gameDisplay.blit(text,(0,0))

def things(thingx, thingy, thingw, thingh, color):
 pygame.draw.rect(gameDisplay, color, [thingx, thingy, thingw, thingh])

def car(x, y):
 gameDisplay.blit(carImg, (x,y))

def text_objects(text, font):
 textSurface = font.render(text, True, black)
 return textSurface, textSurface.get_rect()

def message_diaplay(text):
 largeText = pygame.font.Font('freesansbold.ttf',115)
 TextSurf, TextRect = text_objects(text, largeText)
 TextRect.center = ((display_width/2),(display_height/2))
 gameDisplay.blit(TextSurf, TextRect)
 pygame.display.update()
 time.sleep(2)
 game_loop()

def crash():
 message_diaplay('You Crashed')

def button (msg, x, y, w, h, ic, ac):
 mouse =pygame.mouse.get_pos()
 if x + w > mouse[0] > x and y + h > mouse[1] > y:
 pygame.draw.rect(gameDisplay, ac, (x,y,w,h))
 else:
 pygame.draw.rect(gameDisplay, ic, (x,y,w,h))
 smallText = pygame.font.Font("freesansbold.ttf", 20)
 textSurf, textRect = text_objects(msg, smallText)
 textRect.center = ( (x+(w/2)), (y+(h/2)))
 gameDisplay.blit(textSurf, textRect)

def game_intro():
 intro = True
 while intro:
 for event in pygame.event.get():
 print(event)
 if event.type == pygame.QUIT:
 pygame.quit()
 quit()
 gameDisplay.fill(white)
 largeText = pygame.font.Font('freesansbold.ttf',115)
 TextSurf, TextRect = text_objects('A bit Racey', largeText)
 TextRect.center = ((display_width/2),(display_height/2))
 gameDisplay.blit(TextSurf, TextRect)
 button("GO", 150, 450, 100, 50, green, bright_green)
 button("Quit",550, 450, 100, 50, red, bright_red)
 pygame.display.update()
 clock.tick(15)

def game_loop():
 x = display_width * 0.45
 y = display_height * 0.8
 x_change = 0

 dodged = 0

 gameExit = False

 thing_startx = random.randrange(0, display_width)
 thing_starty = -600
 thing_speed = 7
 thing_width = 100
 thing_height = 100

 while not gameExit:
 for event in pygame.event.get():
 if event.type == pygame.QUIT:
 pygame.quit()
 quit()
 if event.type == pygame.KEYDOWN:
 if event.key == pygame.K_LEFT:
  x_change = -5
 elif event.key == pygame.K_RIGHT:
  x_change = 5
 if event.type == pygame.KEYUP:
 if event.key == pygame.K_LEFT or event.key == pygame.K_RIGHT:
  x_change = 0
 print(event)
 x += x_change
 gameDisplay.fill(white)

 things(thing_startx, thing_starty, thing_width, thing_height, black)
 thing_starty += thing_speed

 car(x,y)
 things_dodged(dodged)
 if x > display_width - car_width or x < 0:
 gameExit = True
 if thing_starty > display_height:
 thing_starty = 0 - thing_height
 thing_startx = random.randrange(0, display_width)
 dodged += 1
 thing_speed += 1
 thing_width += (dodged * 1.2)
 if y < thing_starty + thing_height:
 print('y crossover')
 if x > thing_startx and x < thing_startx + thing_width or x + car_width > thing_startx and x + car_width < thing_startx + thing_width:
 print('x crossover')
 crash()
 pygame.display.update()
 clock.tick(60)
#crash()
game_intro()
game_loop()
pygame.quit()
quit()
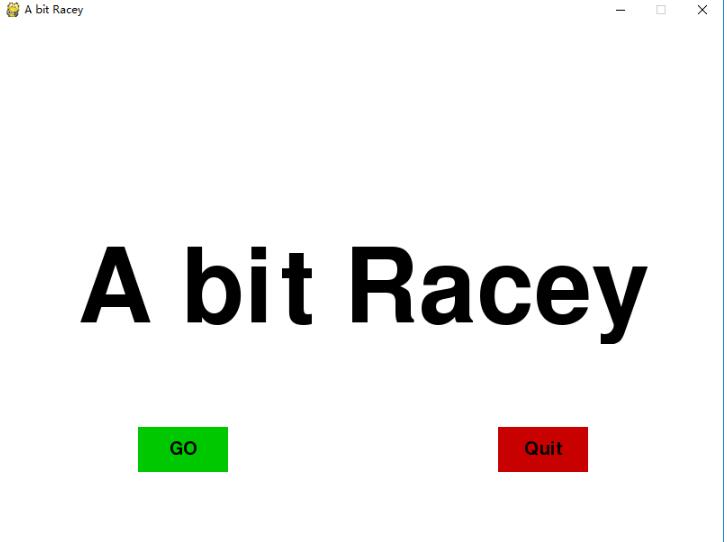
结果图:
以上就是本文的全部内容,希望对大家的学习有所帮助,也希望大家多多支持我们。
相关推荐
-

pygame实现非图片按钮效果
本文实例为大家分享了pygame实现非图片按钮效果的具体代码,供大家参考,具体内容如下 按钮类程序 # -*- coding=utf-8 -*- import threading import pygame from pygame.locals import MOUSEBUTTONDOWN class BFControlId(object): _instance_lock = threading.Lock() def __init__(self): self.id = 1 @classmetho
-
pygame游戏之旅 调用按钮实现游戏开始功能
本文为大家分享了pygame游戏之旅的第12篇,供大家参考,具体内容如下 实现点击功能: click = pygame.mouse.get_pressed() print(click) if x + w > mouse[0] > x and y + h > mouse[1] > y: pygame.draw.rect(gameDisplay, ac, (x,y,w,h)) if click[0] == 1 and action != None: action() 修改显示文字: p
-
pygame游戏之旅 按钮上添加文字的方法
本文为大家分享了pygame游戏之旅的第11篇,供大家参考,具体内容如下 定义一个button函数,将文字,颜色等作为参数. def button (msg, x, y, w, h, ic, ac): mouse =pygame.mouse.get_pos() if x + w > mouse[0] > x and y + h > mouse[1] > y: pygame.draw.rect(gameDisplay, ac, (x,y,w,h)) else: pygame.draw
-
pygame游戏之旅 游戏中添加显示文字
本文为大家分享了pygame游戏之旅的第5篇,供大家参考,具体内容如下 在游戏中添加显示文字: 这里自己定义一个crash函数接口: def crash(): message_diaplay('You Crashed') 然后实现接口函数message_display(text) def message_diaplay(text): largeText = pygame.font.Font('freesansbold.ttf',115) TextSurf, TextRect = text_obj
-
iOS 按钮上的文字添加下划线的方法
问题:实现下图中右侧的按钮文字效果 方法: [MyTools createMyImageview:topEditView frame:CGRectMake(widthAll-90, 12, 17, 16) imageName:@"离线课程_下载更多.png"]; UIButton *downMoreButton = [MyTools createMyBtn:@"下载更多" frame:CGRectMake(widthAll-70, 10, 60, 20) uivie
-
pygame游戏之旅 添加icon和bgm音效的方法
本文为大家分享了pygame游戏之旅的第14篇,供大家参考,具体内容如下 添加icon需要用的函数是: gameIcon = pygame.image.load("carIcon.png") pygame.display.set_icon(gameIcon) 添加bgm和音效的函数是: crash_sound = pygame.mixer.Sound("crashed.wav") pygame.mixer.music.load("bgm.wav"
-
pygame游戏之旅 添加键盘按键的方法
本文为大家分享了pygame游戏之旅的第4篇,供大家参考,具体内容如下 按键类型用event.type表示,按键用event.key表示 KEYDOWN和KEYUP的参数描述如下: key – 按下或者放开的键值,是一个数字,估计地球上很少有人可以记住,所以Pygame中可以使用K_xxx来表示,比如字母a就是K_a,还有K_SPACE和K_RETURN等. mod – 包含了组合键信息,如果mod & KMOD_CTRL是真的话,表示用户同时按下了Ctrl键.类似的还有KMOD_SHIFT,K
-
pygame游戏之旅 添加碰撞效果的方法
本文为大家分享了pygame游戏之旅的第7篇,供大家参考,具体内容如下 对car和障碍的宽高进行比较然后打印即可: if y < thing_starty + thing_height: print('y crossover') if x > thing_startx and x < thing_startx + thing_width or x + car_width > thing_startx and x + car_width < thing_startx + thi
-
pygame游戏之旅 添加游戏介绍
本文为大家分享了pygame游戏之旅的第9篇,供大家参考,具体内容如下 在游戏开始之前定义一个函数,用来显示游戏介绍: def game_intro(): intro = True while intro: for event in pygame.event.get(): print(event) if event.type == pygame.QUIT: pygame.quit() quit() gameDisplay.fill(white) largeText = pygame.font.F
-
pygame游戏之旅 添加游戏暂停功能
本文为大家分享了pygame游戏之旅的第13篇,供大家参考,具体内容如下 定义暂停函数: def paused(): largeText = pygame.font.SysFont('comicsansms',115) TextSurf, TextRect = text_objects('Paused', largeText) TextRect.center = ((display_width/2),(display_height/2)) gameDisplay.blit(TextSurf, T
-
pygame游戏之旅 添加游戏界面按键图形
本文为大家分享了pygame游戏之旅的第10篇,供大家参考,具体内容如下 通过获取鼠标的位置然后进行高亮显示: mouse =pygame.mouse.get_pos() if 150 + 100 > mouse[0] > 150 and 450 + 50 > mouse[1] > 450: pygame.draw.rect(gameDisplay, bright_green, (150,450,100,50)) else: pygame.draw.rect(gameDisplay