Android开发之splash界面下详解及实例
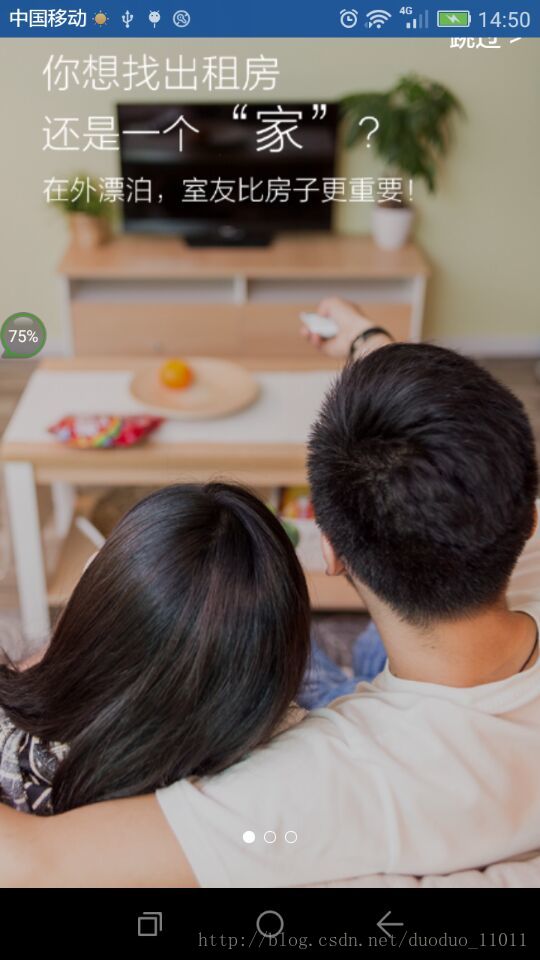
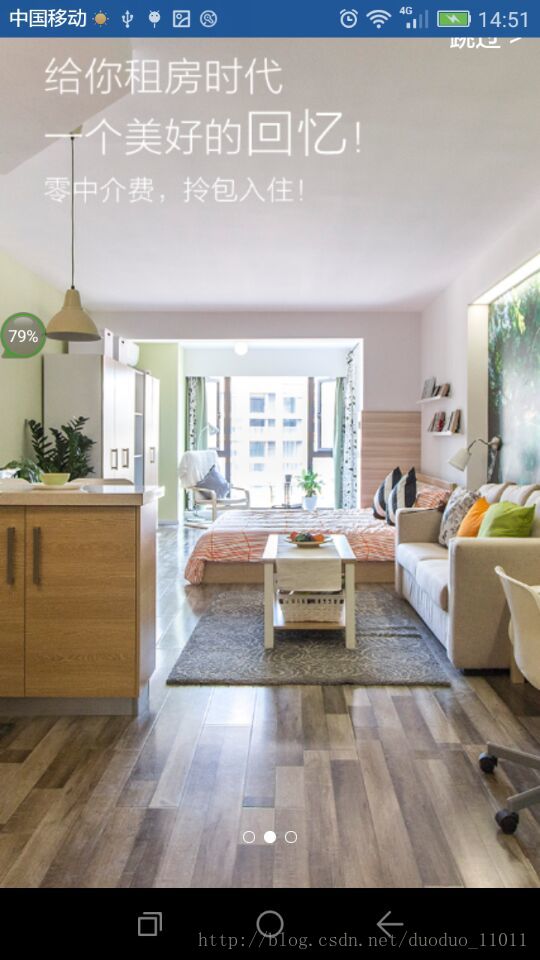
现在刚下载的很多APP应用第一次打开都会在进入主界面之前有导航页,用来展示公司logo,或者推广自身这款APP。先上效果图:


首先解释一下:支持进入首页只能往右滑动,中间可以左右滑动,最后一张只能向前滑动,点击立即体验会进入主界面,点击跳过也会进入到主界面。接下来上代码。
1,在app/build.gradle中的闭包中加入:
compile 'cn.bingoogolapple:bga-banner:2.1.6@aar'
compile 'com.android.support:support-v4:24.1.0'
2,布局文件:activity_splash.xml。
<?xml version="1.0" encoding="utf-8"?>
<RelativeLayout xmlns:android="http://schemas.android.com/apk/res/android"
  xmlns:app="http://schemas.android.com/apk/res-auto"
  xmlns:tools="http://schemas.android.com/tools"
  android:id="@+id/activity_splash"
  android:layout_width="match_parent"
  android:layout_height="match_parent"
  tools:context="com.gyq.cloudreader.SplashActivity">

  <cn.bingoogolapple.bgabanner.BGAGuideLinkageLayout style="@style/MatchMatch">

    <cn.bingoogolapple.bgabanner.BGABanner
      android:id="@+id/banner_guide_background"
      style="@style/MatchMatch"
      app:banner_pageChangeDuration="1000"
      app:banner_pointAutoPlayAble="false"
      app:banner_pointContainerBackground="@android:color/transparent"
      app:banner_pointDrawable="@drawable/bga_banner_selector_point_hollow"
      app:banner_pointTopBottomMargin="15dp"
      app:banner_transitionEffect="fade"/>

    <cn.bingoogolapple.bgabanner.BGABanner
      android:id="@+id/banner_guide_foreground"
      style="@style/MatchMatch"
      app:banner_pageChangeDuration="1000"
      app:banner_pointAutoPlayAble="false"
      app:banner_pointContainerBackground="@android:color/transparent"
      app:banner_pointDrawable="@drawable/bga_banner_selector_point_hollow"
      app:banner_pointTopBottomMargin="15dp"
      app:banner_transitionEffect="alpha"/>
  </cn.bingoogolapple.bgabanner.BGAGuideLinkageLayout>

  <TextView
    android:id="@+id/tv_guide_skip"
    style="@style/WrapWrap"
    android:layout_alignParentRight="true"
    android:layout_marginRight="8dp"
    android:layout_marginTop="8dp"
    android:clickable="true"
    android:padding="4dp"
    android:text="跳过 >"
    android:textColor="@android:color/white"
    android:textSize="16sp"/>

  <Button
    android:id="@+id/btn_guide_enter"
    style="@style/WrapWrap"
    android:layout_alignParentBottom="true"
    android:layout_centerHorizontal="true"
    android:layout_marginBottom="60dp"
    android:background="@drawable/selector_btn_test"
    android:padding="10dp"
    android:text="立即体验"
    android:textColor="@android:color/white"
    android:textSize="20sp"
    android:visibility="gone"
    tools:visibility="visible"/>

</RelativeLayout>
3,逻辑代码,SplashActivity.java
package com.gyq.cloudreader;

import android.content.Intent;
import android.os.Bundle;
import android.support.v7.app.AppCompatActivity;

import cn.bingoogolapple.bgabanner.BGABanner;

/**
 * 引导界面
 */
public class SplashActivity extends AppCompatActivity {
  private BGABanner mBackgroundBanner;
  private BGABanner mForegroundBanner;
  @Override
  protected void onCreate(Bundle savedInstanceState) {
    super.onCreate(savedInstanceState);
    setContentView(R.layout.activity_splash);

    initView();

    initListener();

    processLogic();

  }

  private void initView() {
    mBackgroundBanner = (BGABanner)findViewById(R.id.banner_guide_background);
    mForegroundBanner = (BGABanner)findViewById(R.id.banner_guide_foreground);
  }

  private void initListener() {
    mForegroundBanner.setEnterSkipViewIdAndDelegate(R.id.btn_guide_enter, R.id.tv_guide_skip, new BGABanner.GuideDelegate() {
      @Override
      public void onClickEnterOrSkip() {
        startActivity(new Intent(SplashActivity.this, MainActivity.class));
        finish();
      }
    });

  }

  private void processLogic() {
    //设置数据源
    mBackgroundBanner.setData(R.drawable.uoko_guide_background_1,R.drawable.uoko_guide_background_2,R.drawable.uoko_guide_background_3);
    mForegroundBanner.setData(R.drawable.uoko_guide_foreground_1,R.drawable.uoko_guide_foreground_2,R.drawable.uoko_guide_foreground_3);
  }

  @Override
  protected void onResume() {
    super.onResume();

    // 如果开发者的引导页主题是透明的,需要在界面可见时给背景 Banner 设置一个白色背景,避免滑动过程中两个 Banner 都设置透明度后能看到 Launcher
    mBackgroundBanner.setBackgroundResource(android.R.color.white);
  }
}
小结:记得以前写一个这样的引导页,还需要自己手写半天,现在有开源啦!看上面的代码我想你应该已经知道了这个就是用的BGABanner来实现的。不过还有点小细节。
1,布局文件中的style=”@style/WrapWrap”,我们需要在values文件夹下新建一个styles_base.xml。
<?xml version="1.0" encoding="utf-8"?>
<resources xmlns:android="http://schemas.android.com/apk/res/android">

  <style name="WrapMatch">
    <item name="android:layout_width">wrap_content</item>
    <item name="android:layout_height">match_parent</item>
  </style>

  <style name="MatchWrap">
    <item name="android:layout_width">match_parent</item>
    <item name="android:layout_height">wrap_content</item>
  </style>

  <style name="WrapWrap">
    <item name="android:layout_width">wrap_content</item>
    <item name="android:layout_height">wrap_content</item>
  </style>

  <style name="MatchMatch">
    <item name="android:layout_width">match_parent</item>
    <item name="android:layout_height">match_parent</item>
  </style>

  <style name="MatchAuto">
    <item name="android:layout_width">match_parent</item>
    <item name="android:layout_weight">1</item>
    <item name="android:layout_height">0dp</item>
  </style>

  <style name="AutoMatch">
    <item name="android:layout_width">0dp</item>
    <item name="android:layout_weight">1</item>
    <item name="android:layout_height">match_parent</item>
  </style>

  <style name="WrapAuto">
    <item name="android:layout_width">wrap_content</item>
    <item name="android:layout_weight">1</item>
    <item name="android:layout_height">0dp</item>
  </style>

  <style name="AutoWrap">
    <item name="android:layout_width">0dp</item>
    <item name="android:layout_weight">1</item>
    <item name="android:layout_height">wrap_content</item>
  </style>

  <style name="WrapMatch.Vertical">
    <item name="android:orientation">vertical</item>
  </style>

  <style name="WrapMatch.Horizontal">
    <item name="android:orientation">horizontal</item>
  </style>

  <style name="MatchWrap.Vertical">
    <item name="android:orientation">vertical</item>
  </style>

  <style name="MatchWrap.Horizontal">
    <item name="android:orientation">horizontal</item>
  </style>

  <style name="WrapWrap.Vertical">
    <item name="android:orientation">vertical</item>
  </style>

  <style name="WrapWrap.Horizontal">
    <item name="android:orientation">horizontal</item>
  </style>

  <style name="MatchMatch.Vertical">
    <item name="android:orientation">vertical</item>
  </style>

  <style name="MatchMatch.Horizontal">
    <item name="android:orientation">horizontal</item>
  </style>

  <style name="MatchAuto.Vertical">
    <item name="android:orientation">vertical</item>
  </style>

  <style name="MatchAuto.Horizontal">
    <item name="android:orientation">horizontal</item>
  </style>

  <style name="AutoMatch.Vertical">
    <item name="android:orientation">vertical</item>
  </style>

  <style name="AutoMatch.Horizontal">
    <item name="android:orientation">horizontal</item>
  </style>

  <style name="WrapAuto.Vertical">
    <item name="android:orientation">vertical</item>
  </style>

  <style name="WrapAuto.Horizontal">
    <item name="android:orientation">horizontal</item>
  </style>

  <style name="AutoWrap.Vertical">
    <item name="android:orientation">vertical</item>
  </style>

  <style name="AutoWrap.Horizontal">
    <item name="android:orientation">horizontal</item>
  </style>

  <style name="MatchOne">
    <item name="android:layout_width">match_parent</item>
    <item name="android:layout_height">1px</item>
  </style>

  <style name="OneMatch">
    <item name="android:layout_width">1px</item>
    <item name="android:layout_height">match_parent</item>
  </style>
</resources>
还有styles.xml文件中添加如下代码,这样可以整个屏幕显示:
<resources>

  <!-- Base application theme. -->
  <style name="AppTheme" parent="Theme.AppCompat.Light.NoActionBar">
    <!-- Customize your theme here. -->
    <item name="colorPrimary">@color/colorPrimary</item>
    <item name="colorPrimaryDark">@color/colorPrimaryDark</item>
    <item name="colorAccent">@color/colorAccent</item>
  </style>

  <!--避免第一次进来白屏或黑屏-->
  <style name="AppTheme.Splash">
    <item name="windowActionBar">false</item>
    <item name="windowNoTitle">true</item>
    <item name="android:windowBackground">@android:color/transparent</item>
    <item name="android:colorBackgroundCacheHint">@null</item>
    <item name="android:windowIsTranslucent">true</item>
    <item name="android:windowFullscreen">true</item>
    <item name="android:windowContentOverlay">@null</item>
  </style>

</resources>
最后清单文件,注册SplashActivity是写如下代码。
<activity android:name=".SplashActivity"
      android:label="@string/app_name"
      android:screenOrientation="portrait"
      android:theme="@style/AppTheme.Splash">
      <intent-filter>
        <action android:name="android.intent.action.MAIN" />

        <category android:name="android.intent.category.LAUNCHER" />
      </intent-filter>
    </activity>
感谢阅读,希望能帮助到大家,谢谢大家对本站的支持!
赞 (0)

