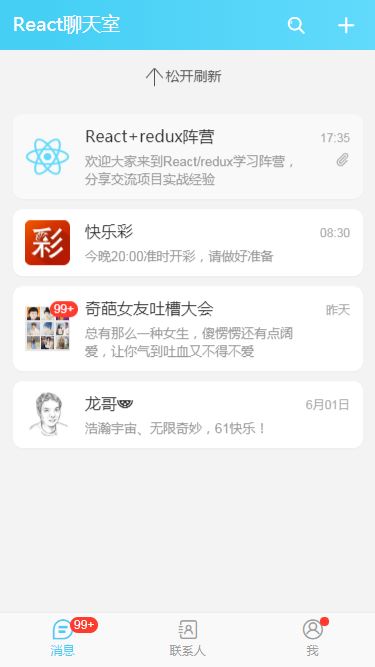
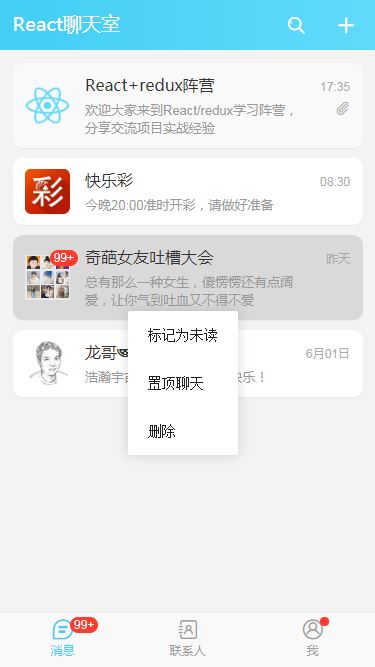
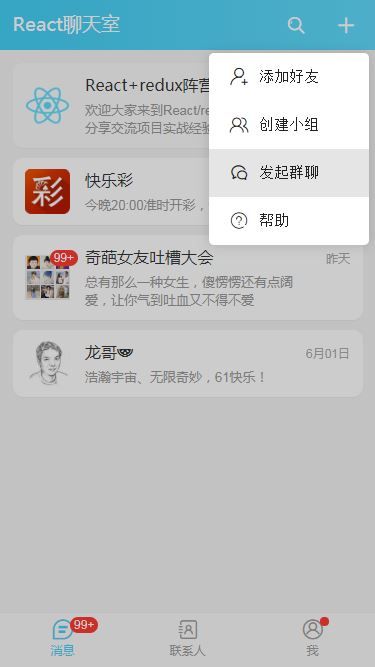
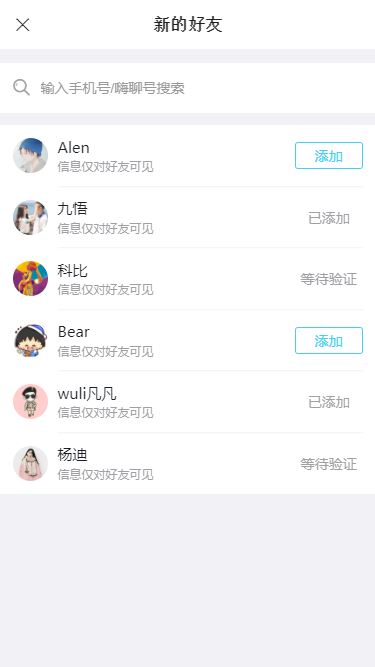
react+redux仿微信聊天界面

一、项目概况

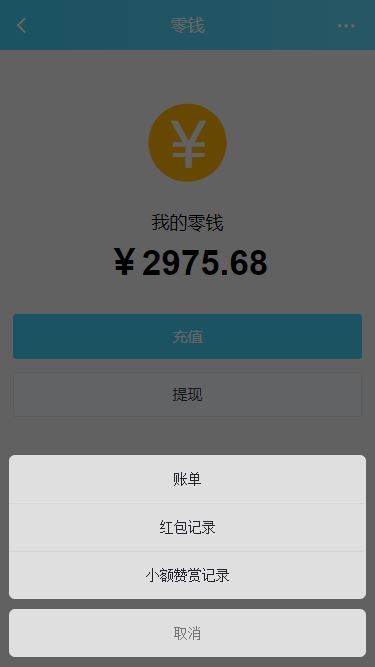
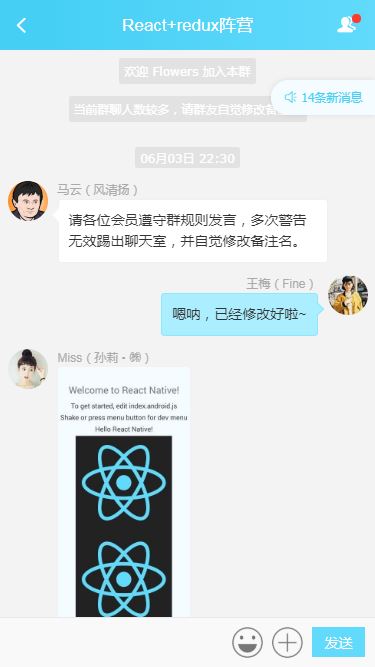
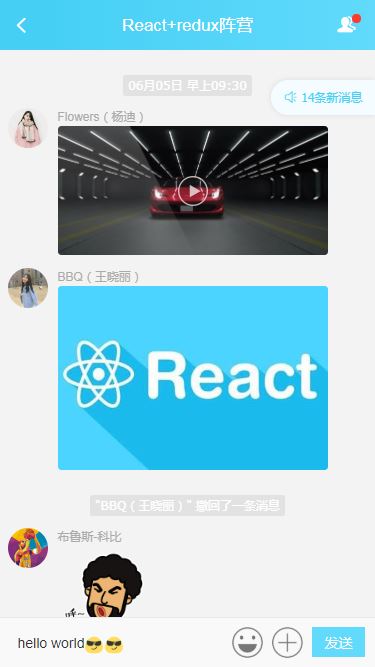
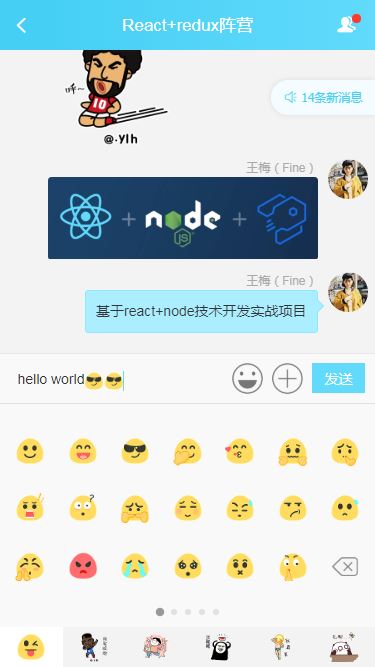
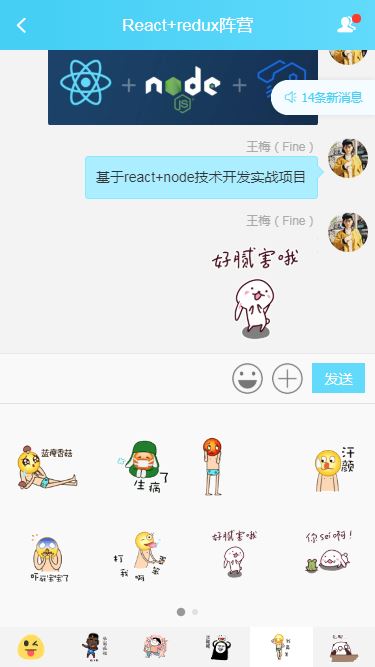
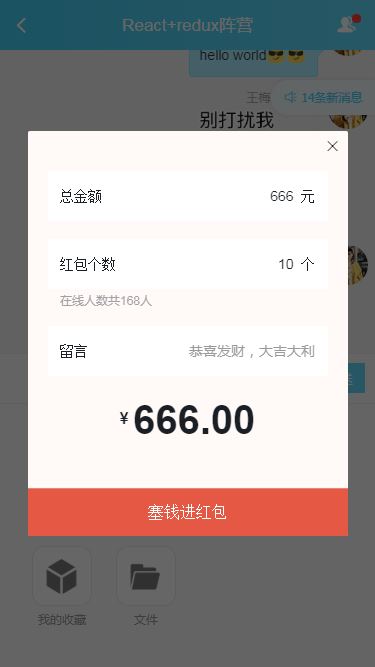
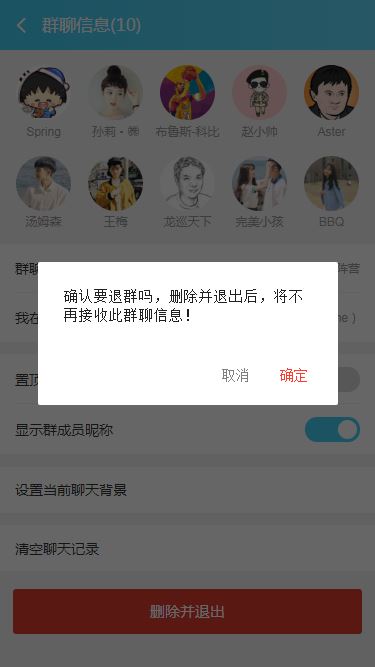
基于react+react-dom+react-router-dom+redux+react-redux+webpack2.0+react-photoswipe+swiper等技术混合开发的手机端仿微信界面聊天室——reactChatRoom,实现了聊天记录下拉刷新、发送消息、表情(动图),图片、视频预览,打赏、红包等功能。

二、技术栈MVVM框架:

react / react-dom状态管理:redux / react-redux页面路由:react-router-dom弹窗插件:wcPop打包工具:webpack 2.0环境配置:node.js + cnpm图片预览:react-photoswipe轮播滑动:swiper
◆package.json依赖安装:

{
 "name": "react-chatroom",
 "version": "0.1.0",
 "private": true,
 "author": "andy",
 "dependencies": {
  "react": "^16.8.6",
  "react-dom": "^16.8.6",
  "react-redux": "^7.0.3",
  "react-router-dom": "^5.0.0",
  "react-scripts": "0.9.x",
  "redux": "^4.0.1"
 },
 "devDependencies": {
  "jquery": "^2.2.3",
  "react-loadable": "^5.5.0",
  "react-photoswipe": "^1.3.0",
  "react-pullload": "^1.2.0",
  "redux-thunk": "^2.3.0",
  "swiper": "^4.5.0",
  "webpack": "^1.13.1",
  "webpack-dev-server": "^1.12.0"
 },
 "scripts": {
  "start": "set HOST=localhost&&set PORT=3003 && react-scripts start",
  "build": "react-scripts build",
  "test": "react-scripts test --env=jsdom",
  "eject": "react-scripts eject"
 }
}

◆ 入口页面index.js配置

/*
 * @desc 入口页面index.js
 */
import React from 'react';
import ReactDOM from 'react-dom';
// import {HashRouter as Router, Route} from 'react-router-dom'
import App from './App';
// 引入状态管理
import {Provider} from 'react-redux'
import {store} from './store'
// 导入公共样式
import './assets/fonts/iconfont.css'
import './assets/css/reset.css'
import './assets/css/layout.css'
// 引入wcPop弹窗样式
import './assets/js/wcPop/skin/wcPop.css'
// 引入js
import './assets/js/fontSize'
ReactDOM.render(
 <Provider store={store}>
  <App />
 </Provider>,
 document.getElementById('app')
);

◆ 页面App.js主模板

import React, { Component } from 'react';
import {HashRouter as Router, Route, Switch, Redirect} from 'react-router-dom'
import {connect} from 'react-redux'
import $ from 'jquery'
// 引入wcPop弹窗插件
import { wcPop } from './assets/js/wcPop/wcPop'
// 引入地址路由
import routers from './router'
// 导入顶部、底部tabbar
import HeaderBar from './components/header'
import TabBar from './components/tabbar'
class App extends Component {
 constructor(props){
  super(props)
  console.log('App主页面参数:\n' + JSON.stringify(props, null, 2))
 }
 render() {
  let token = this.props.token
  return (
   <Router>
    <div className="weChatIM__panel clearfix">
     <div className="we__chatIM-wrapper flexbox flex__direction-column">
      {/* 顶部 */}
      <Switch>
       <HeaderBar />
      </Switch>
      {/* 主页面 */}
      <div className="wcim__container flex1">
       {/* 路由容器 */}
       <Switch>
        {
         routers.map((item, index) => {
          return <Route key={index} path={item.path} exact render={props => (
           !item.meta || !item.meta.requireAuth ? (<item.component {...props} />) : (
            token ? <item.component {...props} /> : <Redirect to={{pathname: '/login', state: {from: props.location}}} />
           )
          )} />
         })
        }
        {/* 初始化页面跳转 */}
        <Redirect push to="/index" />
       </Switch>
      </div>
      {/* 底部tabbar */}
      <Switch>
       <TabBar />
      </Switch>
     </div>
    </div>
   </Router>
  );
 }
}
const mapStateToProps = (state) =>{
 return {
  ...state.auth
 }
}
export default connect(mapStateToProps)(App);

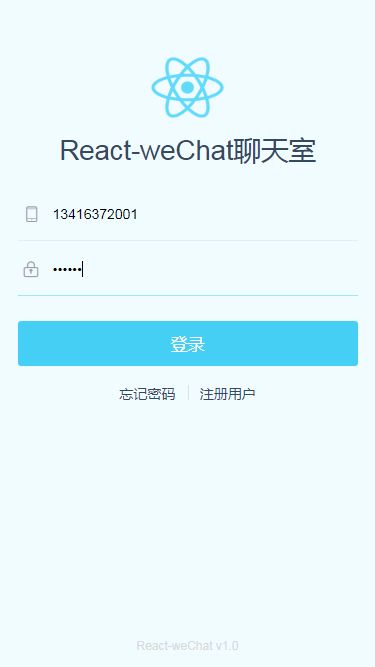
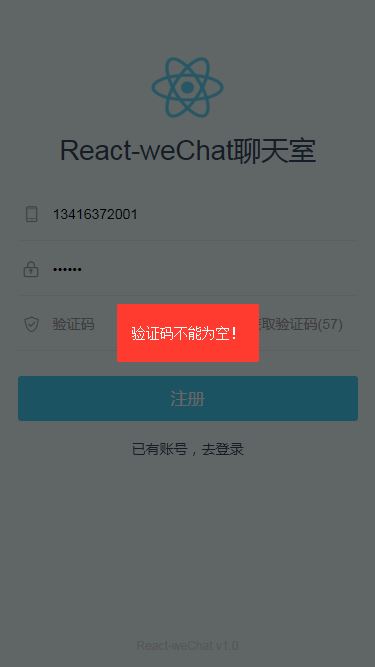
◆ react登录、注册模块 / react登录注册验证

import React, { Component } from 'react';
import { Link } from 'react-router-dom'
import { connect } from 'react-redux';
import * as actions from '../../store/action'
// 引入wcPop弹窗插件
import { wcPop } from '../../assets/js/wcPop/wcPop.js'
class Login extends Component {
  constructor(props) {
    super(props)
    this.state = {
      tel: '',
      pwd: '',
      vcode: '',
      vcodeText: '获取验证码',
      disabled: false,
      time: 0
    }
  }
  componentDidMount(){
    if(this.props.token){
      this.props.history.push('/')
    }
  }
  render() {
    return (
      <div className="wcim__lgregWrapper flexbox flex__direction-column">
        ......
      </div>
    )
  }
  // 提交表单
  handleSubmit = (e) => {
    e.preventDefault();
    var that = this
    this.state.tel = this.refs.tel.value
    this.state.pwd = this.refs.pwd.value
    this.state.vcode = this.refs.vcode.value
    if (!this.state.tel) {
      wcPop({ content: '手机号不能为空!', style: 'background:#ff3b30;color:#fff;', time: 2 });
    } else if (!checkTel(this.state.tel)) {
      wcPop({ content: '手机号格式不正确!', style: 'background:#ff3b30;color:#fff;', time: 2 });
    } else if (!this.state.pwd) {
      wcPop({ content: '密码不能为空!', style: 'background:#ff3b30;color:#fff;', time: 2 });
    } else if (!this.state.vcode) {
      wcPop({ content: '验证码不能为空!', style: 'background:#ff3b30;color:#fff;', time: 2 });
    } else {
      // 获取登录之前的页面地址
      let redirectUrl = this.props.location.state ? this.props.location.state.from.pathname : '/'
      // 设置token
      this.props.authToken(getToken())
      this.props.authUser(this.state.tel)
      wcPop({
        content: '注册成功!', style: 'background:#41b883;color:#fff;', time: 2,
        end: function () {
          that.props.history.push(redirectUrl)
        }
      });
    }
  }
  // 60s倒计时
  handleVcode = (e) => {
    e.preventDefault();
    this.state.tel = this.refs.tel.value
    if (!this.state.tel) {
      wcPop({ content: '手机号不能为空!', style: 'background:#ff3b30;color:#fff;', time: 2 });
    } else if (!checkTel(this.state.tel)) {
      wcPop({ content: '手机号格式不正确!', style: 'background:#ff3b30;color:#fff;', time: 2 });
    } else {
      this.state.time = 60
      this.state.disabled = true
      this.countDown();
    }
  }
  countDown = (e) => {
    if(this.state.time > 0){
      this.state.time--
      this.setState({
        vcodeText: '获取验证码(' + this.state.time + ')'
      })
      // setTimeout(this.countDown, 1000);
      setTimeout(() => {
        this.countDown()
      }, 1000);
    }else{
      this.setState({
        time: 0,
        vcodeText: '获取验证码',
        disabled: false
      })
    }
  }
}
const mapStateToProps = (state) => {
  return {
    ...state.auth
  }
}
export default connect(mapStateToProps, {
  authToken: actions.setToken,
  authUser: actions.setUser
})(Login)

总结

以上所述是小编给大家介绍的react+redux仿微信聊天界面,希望对大家有所帮助,如果大家有任何疑问欢迎给我留言,小编会及时回复大家的!

(0)

相关推荐

  • 详解如何优雅地在React项目中使用Redux

    前言 或许你当前的项目还没有到应用Redux的程度,但提前了解一下也没有坏处,本文不会安利大家使用Redux 概念 首先我们会用到哪些框架和工具呢? React UI框架 Redux 状态管理工具,与React没有任何关系,其他UI框架也可以使用Redux react-redux React插件,作用:方便在React项目中使用Redux react-thunk 中间件,作用:支持异步action 目录结构 Tips:与Redux无关的目录已省略 |--src |-- store Redux目录

  • 详解react、redux、react-redux之间的关系

    本文介绍了react.redux.react-redux之间的关系,分享给大家,也给自己留个笔记,具体如下: React 一些小型项目,只使用 React 完全够用了,数据管理使用props.state即可,那什么时候需要引入Redux呢? 当渲染一个组件的数据是通过props从父组件中获取时,通常情况下是 A --> B,但随着业务复杂度的增加,有可能是这样的:A --> B --> C --> D --> E,E需要的数据需要从A那里通过props传递过来,以及对应的 E

  • react-redux中connect的装饰器用法@connect详解

    最近在琢磨react中的一些小技巧,这篇文章记录一下在redux中用装饰器来写connect. 通常我们需要一个reducer和一个action,然后使用connect来包裹你的Component.假设你已经有一个key为main的reducer和一个action.js. 我们的App.js一般都这么写: import React from 'react' import {render} from 'react-dom' import {connect} from 'react-redux' i

  • react router4+redux实现路由权限控制的方法

    总体概述 一个完善的路由系统应该是这样子的,当链接到的组件是需要登录后才能查看,要能够跳转到登录页,然后登录成功后又跳回来之前想访问的页面.这里主要是用一个权限控制类来定义路由路由信息,同时用redux把登录成功后要访问的路由地址给保存起来,登录成功时看redux里面有没有存地址,如果没有存地址就跳转到默认路由地址. 路由权限控制类 在这个方法里面,通过sessionStorage判断是否登录了,如果没有登录,就保存一下当前想要跳转的路由到redux里面.然后跳转到我们登录页. import R

  • react-redux中connect()方法详细解析

    组件 React-Redux将所有组件分为两大类:展示组件(UI组件),容器组件 展示组件有以下几个特征: 只负责 UI 的呈现,不带有任何业务逻辑 没有状态(即不使用this.state这个变量) 所有数据都由参数(this.props)提供 不使用任何 Redux 的 API 容器组件有以下几个特征: 负责管理数据和业务逻辑,不负责 UI 的呈现 带有内部状态 使用 Redux 的 API 总结为一点: 展示组件负责 UI 的呈现,容器组件负责管理数据和逻辑 connect方法解析 下图是c

  • 浅谈React和Redux的连接react-redux

    之前一直在探索React相关的东西,手上有个SPA项目,于是准备上Redux试试水.Redux本身和React并没有之间的关联,它是一个通用Javscript App模块,用做App State的管理.要在React的项目中使用Redux,比较好的方式是借助react-redux这个库来做连接,这里的意思是,并不是没有react-redux,这两个库就不弄一起用了,而是说react-redux提供了一些封装,一种更科学的代码组织方式,让我们更舒服地在React的代码中使用Redux. 之前仅通过

  • 详解关于react-redux中的connect用法介绍及原理解析

    关于react-redux的一个流程图 流程图 connect用法介绍 connect方法声明: connect([mapStateToProps], [mapDispatchToProps], [mergeProps],[options]) 作用:连接React组件与 Redux store. 参数说明: mapStateToProps(state, ownProps) : stateProps 这个函数允许我们将 store 中的数据作为 props 绑定到组件上. const mapSta

  • react+redux仿微信聊天界面

    一.项目概况 基于react+react-dom+react-router-dom+redux+react-redux+webpack2.0+react-photoswipe+swiper等技术混合开发的手机端仿微信界面聊天室--reactChatRoom,实现了聊天记录下拉刷新.发送消息.表情(动图),图片.视频预览,打赏.红包等功能. 二.技术栈MVVM框架: react / react-dom状态管理:redux / react-redux页面路由:react-router-dom弹窗插件

  • react native 仿微信聊天室实例代码

    一.前言 9月,又到开学的季节.为每个一直默默努力的自己点赞!最近都沉浸在react native原生app开发中,之前也有使用vue/react/angular等技术开发过聊天室项目,另外还使用RN技术做了个自定义模态弹窗rnPop组件. 一.项目简述 基于react+react-native+react-navigation+react-redux+react-native-swiper+rnPop等技术开发的仿微信原生App界面聊天室--RN_ChatRoom,实现了原生app启动页.As

  • Android高仿微信聊天界面代码分享

    微信聊天现在非常火,是因其界面漂亮吗,哈哈,也许吧.微信每条消息都带有一个气泡,非常迷人,看起来感觉实现起来非常难,其实并不难.下面小编给大家分享实现代码. 先给大家展示下实现效果图: OK,下面我们来看一下整个小项目的主体结构: 下面是Activity的代码: package com.way.demo; import java.text.SimpleDateFormat; import java.util.ArrayList; import java.util.Date; import jav

  • 详解微信小程序实现仿微信聊天界面(各种细节处理)

    本文介绍了微信小程序实现仿微信聊天界面,分享给大家,具体如下: 下面先来看看效果 为实现这样的效果,首先要解决两个问题: 1.点击输入框弹出软键盘后,将已有的少许聊天内容弹出,导致看不到的问题: 2.键盘弹出或收起时,聊天消息没有自动滚到最底部. 首先解决第二个问题,自动滚动到最底部,这很简单,这里提供三种方法(推荐第三种): 1.计算每条消息的最大高度,设置scroll-top=(单条msg最大高度 * msg条数)px. 2.用 将展示msg的目标scroll-view包裹, 通过js获取到

  • android仿微信聊天界面 语音录制功能

    本例为模仿微信聊天界面UI设计,文字发送以及语言录制UI. 1先看效果图: 第一:chat.xml设计 <?xml version="1.0" encoding="utf-8"?> <RelativeLayout xmlns:android="http://schemas.android.com/apk/res/android" android:layout_width="fill_parent" andro

  • jquery仿微信聊天界面

    首先看一下我们的效果图. 这个颜色可能搭配的有些不合适,但基本功能大都实现了.就是你和你同桌对话,你发的消息在你的左侧,而在他设备的右侧. 首先先写好整体的框架,在一个大容器中放两个盒子,分别是左侧和右侧的界面.然后每个盒子里面包含了三大部分:头部.内容区.和底部.只要写好一侧,另一侧进行粘贴复制就可以了. 首先定义一个大的 来盛放左右两个盒子. <div id = "main"> //左侧聊天界面 <div id = "box"> <

  • Android ListView仿微信聊天界面

    Android ListView仿聊天界面效果图的具体代码,供大家参考,具体内容如下 1.首先页面总布局(ListView + LinearLayout(TextView+Button)) <LinearLayout xmlns:android="http://schemas.android.com/apk/res/android" android:layout_width="match_parent" android:layout_height="

  • Android仿微信主界面的实现方法

    本文实例为大家分享了Android模仿微信主界面展示的具体代码,供大家参考,具体内容如下 先看一下效果图 实现的原理: ViewPager+FragmentPagerAdapter 主界面可分为三部分: top标题栏就是一个TextView 中间的ViewPager作为显示的容器,填充Fragment bottom是一个RadioGroup 这里为了布局的优化,将top和bottom抽取出来 ,然后用include将其导入主布局,如下 <LinearLayout xmlns:android=&quo

  • Android用ActionBar高仿微信主界面的实例代码

    经过前面两篇文章的学习,我想大家对ActionBar都已经有一个相对较为深刻的理解了.唯一欠缺的是,前面我们都只是学习了理论知识而已,虽然知识点已经掌握了,但是真正投入到项目实战当中时会不会掉链子还很难说.那么不用担心,本篇文章我就将带领大家一起进入ActionBar的应用实战,将理论和实践完美结合到一起. 如果你还没有看过我的前两篇文章,建议先去阅读一下 Android ActionBar完全解析使用官方推荐的最佳导航栏(上)和 Android ActionBar完全解析使用官方推荐的最佳导航

  • gameboy网页闯关游戏(riddle webgame)--仿微信聊天的前端页面设计和难点

    前言: 之前编写了一个网页闯关游戏(类似Riddle Game), 除了希望大家能够体验一下我的游戏外. 也愿意分享编写这个网页游戏过程中, 学到的一些知识. 本文讲描述, 如何在网页端实现一个仿微信的聊天窗口界面, 以及其中涉及到的一些技术点. 作者前端是初学者, 请大拿们轻拍. 效果展示: 这种聊天对话的布局模式, 比PC端QQ的那种聊天方式更贴近移动端, 我个人感觉. 需求设定: 让我们先过一遍, 实现该聊天窗口需要支持的一些功能点. • 聊天消息结构和布局 聊天消息包括: 人物(头像)和

随机推荐