Qt5中QML自定义环形菜单/环形选择框的实现
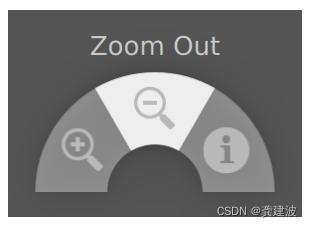
Qt5 中本身提供了扇形菜单 PieMenu,属于 QtQuick.Extras 模块,这个模块是拓展自 QtQuick.Control1 的,QtQuick.Control1 在 Qt5 高版本被废弃,并在 Qt6 移除。

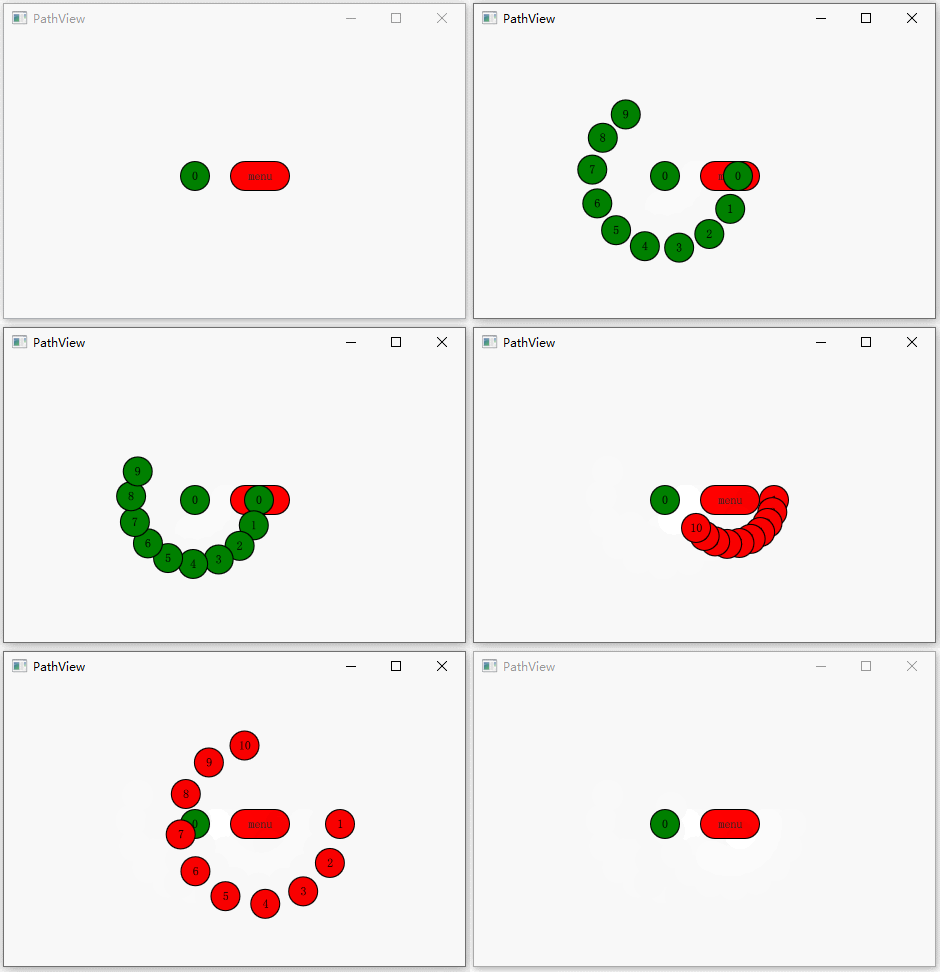
不过我们也可以用 QtQuick.Control2 的组件自定义样式来实现环形或扇形的菜单和选择框。主要思路就是使用 PathView 来替换默认的 ListView,再改下弹框的背景样式。
ItemDelegate 需要设置给 ComboBox 或者 Menu,而不是 View。最好用 Button 的相关类型(默认是 ItemDelegate 类型),因为组件默认这些小部件是 Button 类型,内部 cast 成按钮来处理的。而且用按钮就不用自己处理下拉框 currentIndex,内部会自己处理,这也避免了我们在这个 delegate 对 currentIndex 赋值后导致其属性绑定失效的问题。
QQuickAction *QQuickMenu::actionAt(int index) const
{
    Q_D(const QQuickMenu);
    QQuickAbstractButton *item = qobject_cast<QQuickAbstractButton *>(d->itemAt(index));
    if (!item)
        return nullptr;

    return item->action();
}
自定义的时候遇到一点状况,就是 PathView 替代 ListView 作为 Menu 的 contentItem 后,Menu 的 contentData 和 contentModel 始终会多一个表示高亮的 Item,这样环形路径就有个缺口,目前我只能将显示的 Item 个数减去一个来使显示效果正常。
    contentItem: PathView {
        model: control.contentModel
        //把PathView放Menu,会有一个高亮Item被放到contentModel,减去
        pathItemCount: control.count > 0 ? control.count - 1 : 0
        //... ...
    }
Demo 链接:https://github.com/gongjianbo/MyTestCode2021/tree/master/Qml/TestQml_20220313_PathView

主要代码:
import QtQuick 2.12
import QtQuick.Window 2.12
import QtQuick.Controls 2.12

Window {
    width: 640
    height: 480
    visible: true
    title: qsTr("PathView")

    Row {
        anchors.centerIn: parent
        spacing: 20

        MyComboBox {
            model: 10
        }

        Button {
            width: 60
            height: 30
            text: "menu"
            background: Rectangle {
                radius: 15
                color: "red"
                border.color: "black"
            }
            onClicked: {
                menu.popup()
            }

            MyMenu {
                id: menu
                anchors.centerIn: parent
                Action { text: "1" }
                Action { text: "2" }
                Action { text: "3" }
                Action { text: "4" }
                Action { text: "5" }
                Action { text: "6" }
                Action { text: "7" }
                Action { text: "8" }
                Action { text: "9" }
                Action { text: "10" }
            }
        }
    }
}
import QtQuick 2.12
import QtQuick.Controls 2.12

//环形选择框
//龚建波 2022-03-13
//note:弹框为pop会被限制在window内
ComboBox {
    id: control

    implicitWidth: 30
    implicitHeight: 30
    opacity: 0.9999

    delegate: ItemDelegate {
        width: 30
        height: width
        padding: 0
        background: Rectangle {
            radius: width / 2
            color: "green"
            border.color: "black"
        }
        contentItem: Text {
            text: modelData
            padding: 0
            verticalAlignment: Text.AlignVCenter
            horizontalAlignment: Text.AlignHCenter
        }
    }
    contentItem: Text {
        text: control.displayText
        padding: 0
        verticalAlignment: Text.AlignVCenter
        horizontalAlignment: Text.AlignHCenter
    }
    indicator: null
    background: Rectangle {
        radius: 15
        color: "green"
        border.color: "black"
    }
    popup: Popup {
        id: pop
        width: 200
        height: width
        anchors.centerIn: parent
        margins: 0
        padding: 0
        //pathview环形的角度范围和延申半径
        property int angle: 1
        property int spread: 1
        //pop弹出和隐藏时的过渡动画
        enter: Transition {
            ParallelAnimation {
                NumberAnimation { property: "angle"; from: 1; to: 360; duration: 500 }
                NumberAnimation { property: "spread"; from: 1; to: 100; duration: 500 }
            }
        }
        exit: Transition {
            ParallelAnimation {
                NumberAnimation { property: "angle"; from: 360; to: 1; duration: 500 }
                NumberAnimation { property: "spread"; from: 100; to: 1; duration: 500 }
            }
        }
        background: Item { }
        contentItem: PathView {
            model: control.popup.visible ? control.delegateModel : null
            //currentIndex: control.highlightedIndex
            //highlightRangeMode: PathView.NoHighlightRange
            interactive: false
            path: Path {
                //一个圆环路径
                PathAngleArc {
                    centerX: 100; centerY: 100
                    radiusX: pop.spread; radiusY: pop.spread
                    moveToStart: true
                    startAngle: 0
                    sweepAngle: pop.angle
                }
            }
        }
    }
}
import QtQuick 2.12
import QtQuick.Controls 2.12

//环形菜单
//龚建波 2022-03-13
//note:弹框为pop会被限制在window内
Menu {
    id: control

    implicitWidth: 250
    implicitHeight: 250
    margins: 0
    padding: 0

    //pathview环形的角度范围和延申半径
    property int angle: 1
    property int spread: 1
    //pop弹出和隐藏时的过渡动画
    enter: Transition {
        ParallelAnimation {
            NumberAnimation { property: "angle"; from: 1; to: 360; duration: 500 }
            NumberAnimation { property: "spread"; from: 1; to: 100; duration: 500 }
        }
    }
    exit: Transition {
        ParallelAnimation {
            NumberAnimation { property: "angle"; from: 360; to: 1; duration: 500 }
            NumberAnimation { property: "spread"; from: 100; to: 1; duration: 500 }
        }
    }
    delegate: MenuItem {
        id: item
        width: 30
        height: width
        padding: 0
        spacing: 0
        indicator: null
        arrow: null
        background: Rectangle {
            radius: width / 2
            color: "red"
            border.color: "black"
        }
        contentItem: Text {
            text: item.text
            padding: 0
            verticalAlignment: Text.AlignVCenter
            horizontalAlignment: Text.AlignHCenter
        }
    }
    contentItem: PathView {
        implicitWidth: 250
        implicitHeight: 250
        model: control.contentModel
        //把PathView放Menu,会有一个高亮Item被放到contentModel,减去
        pathItemCount: control.count > 0 ? control.count - 1 : 0
        //currentIndex: control.currentIndex
        //highlightRangeMode: PathView.NoHighlightRange
        interactive: false
        path: Path {
            //一个圆环路径
            PathAngleArc {
                centerX: 125; centerY: 125
                radiusX: control.spread; radiusY: control.spread
                moveToStart: true
                startAngle: 0
                sweepAngle: control.angle
            }
        }
    }
    background: Item { }
}
到此这篇关于Qt5中QML自定义环形菜单/环形选择框的实现的文章就介绍到这了,更多相关Qt5 QML环形菜单内容请搜索我们以前的文章或继续浏览下面的相关文章希望大家以后多多支持我们!

