从零搭建SpringBoot+MyBatisPlus快速开发脚手架
目录
- 前言
- 聊聊mall-tiny项目
- 项目简介
- 项目演示
- 技术选型
- 数据库表结构
- 接口文档
- 使用流程
- 升级过程
- Swagger升级
- Spring Security升级
- MyBatis-Plus升级
- 解决循环依赖问题
- 解决跨域问题
- 总结
前言

关注我Github的小伙伴应该了解,之前我开源了一款快速开发脚手架mall-tiny,该脚手架继承了mall项目的技术栈,拥有完整的权限管理功能。最近抽空把该项目支持了Spring Boot 2.7.0,今天再和大家聊聊这个脚手架,同时聊聊升级项目到Spring Boot 2.7.0的一些注意点,希望对大家有所帮助!
SpringBoot实战电商项目mall(50k+star)地址:https://github.com/macrozheng/mall
聊聊mall-tiny项目
可能有些小伙伴还不了解这个脚手架,我们先来聊聊它!
项目简介
mall-tiny是一款基于SpringBoot+MyBatis-Plus的快速开发脚手架,目前在Github上已有1100+Star。它拥有完整的权限管理功能,支持使用MyBatis-Plus代码生成器生成代码,可对接mall项目的Vue前端,开箱即用。

项目地址:https://github.com/macrozheng/mall-tiny
项目演示
mall-tiny项目可无缝对接mall-admin-web前端项目,秒变前后端分离脚手架,由于mall-tiny项目仅实现了基础的权限管理功能,所以前端对接后只会展示权限管理相关功能。

前端项目地址:https://github.com/macrozheng/mall-admin-web
技术选型
这次升级不仅支持了Spring Boot 2.7.0,其他依赖版本也升级到了最新版本。
| 技术 | 版本 | 说明 |
|---|---|---|
| SpringBoot | 2.7.0 | 容器+MVC框架 |
| SpringSecurity | 5.7.1 | 认证和授权框架 |
| MyBatis | 3.5.9 | ORM框架 |
| MyBatis-Plus | 3.5.1 | MyBatis增强工具 |
| MyBatis-Plus Generator | 3.5.1 | 数据层代码生成器 |
| Swagger-UI | 3.0.0 | 文档生产工具 |
| Redis | 5.0 | 分布式缓存 |
| Docker | 18.09.0 | 应用容器引擎 |
| Druid | 1.2.9 | 数据库连接池 |
| Hutool | 5.8.0 | Java工具类库 |
| JWT | 0.9.1 | JWT登录支持 |
| Lombok | 1.18.24 | 简化对象封装工具 |
数据库表结构
化繁为简,仅保留了权限管理功能相关的9张表,业务简单更加方便定制开发,觉得mall项目学习太复杂的小伙伴可以先学习下mall-tiny。

接口文档
由于升级了Swagger版本,原来的接口文档访问路径已经改变,最新访问路径:http://localhost:8080/swagger-ui/

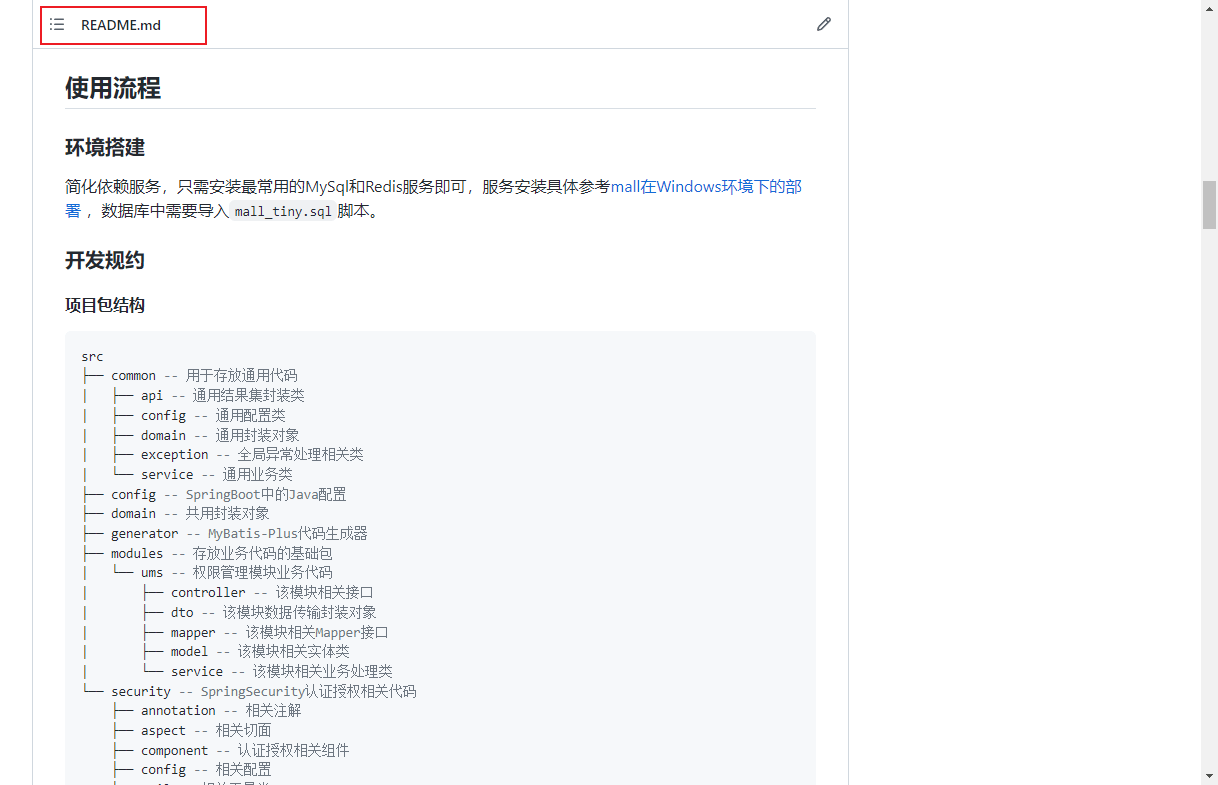
使用流程
升级版本基本不影响之前的使用方式,具体使用流程可以参考最新版README文件:
https://github.com/macrozheng/mall-tiny
升级过程
接下来我们再来聊聊项目升级Spring Boot 2.7.0版本遇到的问题,这些应该是升级该版本的通用问题,你如果想升级2.7.0版本的话,了解下会很有帮助!
Swagger升级
- 在升级Spring Boot 2.6.x版本的时候,其实Swagger就有一定的兼容性问题,需要在配置中添加BeanPostProcessor这个Bean,具体可以参考升级 SpringBoot 2.6.x 版本后,Swagger 没法用了!;
/**
 * Swagger API文档相关配置
 * Created by macro on 2018/4/26.
 */
@Configuration
@EnableSwagger2
public class SwaggerConfig extends BaseSwaggerConfig {
    @Bean
    public static BeanPostProcessor springfoxHandlerProviderBeanPostProcessor() {
        return new BeanPostProcessor() {
            @Override
            public Object postProcessAfterInitialization(Object bean, String beanName) throws BeansException {
                if (bean instanceof WebMvcRequestHandlerProvider || bean instanceof WebFluxRequestHandlerProvider) {
                    customizeSpringfoxHandlerMappings(getHandlerMappings(bean));
                }
                return bean;
            }
            private <T extends RequestMappingInfoHandlerMapping> void customizeSpringfoxHandlerMappings(List<T> mappings) {
                List<T> copy = mappings.stream()
                        .filter(mapping -> mapping.getPatternParser() == null)
                        .collect(Collectors.toList());
                mappings.clear();
                mappings.addAll(copy);
            }
            @SuppressWarnings("unchecked")
            private List<RequestMappingInfoHandlerMapping> getHandlerMappings(Object bean) {
                try {
                    Field field = ReflectionUtils.findField(bean.getClass(), "handlerMappings");
                    field.setAccessible(true);
                    return (List<RequestMappingInfoHandlerMapping>) field.get(bean);
                } catch (IllegalArgumentException | IllegalAccessException e) {
                    throw new IllegalStateException(e);
                }
            }
        };
    }
}
- 之前我们通过@Api注解的description属性来配置接口描述的方法已经被弃用了;

- 我们可以使用@Tag注解来配置接口说明,并使用@Api注解中的tags属性来指定。

Spring Security升级
升级Spring Boot 2.7.0版本后,原来通过继承WebSecurityConfigurerAdapter来配置的方法已经被弃用了,仅需配置SecurityFilterChainBean即可,具体参考Spring Security最新用法。
/**
 * SpringSecurity 5.4.x以上新用法配置
 * 为避免循环依赖,仅用于配置HttpSecurity
 * Created by macro on 2019/11/5.
 */
@Configuration
public class SecurityConfig {
    @Autowired
    private IgnoreUrlsConfig ignoreUrlsConfig;
    @Autowired
    private RestfulAccessDeniedHandler restfulAccessDeniedHandler;
    @Autowired
    private RestAuthenticationEntryPoint restAuthenticationEntryPoint;
    @Autowired
    private JwtAuthenticationTokenFilter jwtAuthenticationTokenFilter;
    @Autowired
    private DynamicSecurityService dynamicSecurityService;
    @Autowired
    private DynamicSecurityFilter dynamicSecurityFilter;
    @Bean
    SecurityFilterChain filterChain(HttpSecurity httpSecurity) throws Exception {
        ExpressionUrlAuthorizationConfigurer<HttpSecurity>.ExpressionInterceptUrlRegistry registry = httpSecurity
                .authorizeRequests();
        //不需要保护的资源路径允许访问
        for (String url : ignoreUrlsConfig.getUrls()) {
            registry.antMatchers(url).permitAll();
        }
        //允许跨域请求的OPTIONS请求
        registry.antMatchers(HttpMethod.OPTIONS)
                .permitAll();
        // 任何请求需要身份认证
        registry.and()
                .authorizeRequests()
                .anyRequest()
                .authenticated()
                // 关闭跨站请求防护及不使用session
                .and()
                .csrf()
                .disable()
                .sessionManagement()
                .sessionCreationPolicy(SessionCreationPolicy.STATELESS)
                // 自定义权限拒绝处理类
                .and()
                .exceptionHandling()
                .accessDeniedHandler(restfulAccessDeniedHandler)
                .authenticationEntryPoint(restAuthenticationEntryPoint)
                // 自定义权限拦截器JWT过滤器
                .and()
                .addFilterBefore(jwtAuthenticationTokenFilter, UsernamePasswordAuthenticationFilter.class);
        //有动态权限配置时添加动态权限校验过滤器
        if(dynamicSecurityService!=null){
            registry.and().addFilterBefore(dynamicSecurityFilter, FilterSecurityInterceptor.class);
        }
        return httpSecurity.build();
    }
}
MyBatis-Plus升级
MyBatis-Plus从之前的版本升级到了3.5.1版本,用法没有大的改变,感觉最大的区别就是代码生成器的用法改了。 在之前的用法中我们是通过new对象然后set各种属性来配置的,具体参考如下代码:
/**
 * MyBatisPlus代码生成器
 * Created by macro on 2020/8/20.
 */
public class MyBatisPlusGenerator {
    /**
     * 初始化全局配置
     */
    private static GlobalConfig initGlobalConfig(String projectPath) {
        GlobalConfig globalConfig = new GlobalConfig();
        globalConfig.setOutputDir(projectPath + "/src/main/java");
        globalConfig.setAuthor("macro");
        globalConfig.setOpen(false);
        globalConfig.setSwagger2(true);
        globalConfig.setBaseResultMap(true);
        globalConfig.setFileOverride(true);
        globalConfig.setDateType(DateType.ONLY_DATE);
        globalConfig.setEntityName("%s");
        globalConfig.setMapperName("%sMapper");
        globalConfig.setXmlName("%sMapper");
        globalConfig.setServiceName("%sService");
        globalConfig.setServiceImplName("%sServiceImpl");
        globalConfig.setControllerName("%sController");
        return globalConfig;
    }
}
而新版的MyBatis-Plus代码生成器已经改成使用建造者模式来配置了,具体可以参考MyBatisPlusGenerator类中的代码。
/**
 * MyBatisPlus代码生成器
 * Created by macro on 2020/8/20.
 */
public class MyBatisPlusGenerator {
    /**
     * 初始化全局配置
     */
    private static GlobalConfig initGlobalConfig(String projectPath) {
        return new GlobalConfig.Builder()
                .outputDir(projectPath + "/src/main/java")
                .author("macro")
                .disableOpenDir()
                .enableSwagger()
                .fileOverride()
                .dateType(DateType.ONLY_DATE)
                .build();
    }
}
解决循环依赖问题
- 其实Spring Boot从2.6.x版本已经开始不推荐使用循环依赖了,如果你的项目中使用的循环依赖比较多的话,可以使用如下配置开启;
spring:
  main:
    allow-circular-references: true
- 不过既然官方都不推荐使用了,我们最好还是避免循环依赖的好,这里分享下我解决循环依赖问题的一点思路。如果一个类里有多个依赖项,这个类非必要的Bean就不要配置了,可以使用单独的类来配置Bean。比如SecurityConfig这个配置类中,我只声明了必要的SecurityFilterChain配置;
/**
 * SpringSecurity 5.4.x以上新用法配置
 * 为避免循环依赖,仅用于配置HttpSecurity
 * Created by macro on 2019/11/5.
 */
@Configuration
public class SecurityConfig {
    @Autowired
    private IgnoreUrlsConfig ignoreUrlsConfig;
    @Autowired
    private RestfulAccessDeniedHandler restfulAccessDeniedHandler;
    @Autowired
    private RestAuthenticationEntryPoint restAuthenticationEntryPoint;
    @Autowired
    private JwtAuthenticationTokenFilter jwtAuthenticationTokenFilter;
    @Autowired
    private DynamicSecurityService dynamicSecurityService;
    @Autowired
    private DynamicSecurityFilter dynamicSecurityFilter;
    @Bean
    SecurityFilterChain filterChain(HttpSecurity httpSecurity) throws Exception {
        //省略若干代码...
        return httpSecurity.build();
    }
}
- 其他配置都被我移动到了CommonSecurityConfig配置类中,这样就避免了之前的循环依赖;
/**
 * SpringSecurity通用配置
 * 包括通用Bean、Security通用Bean及动态权限通用Bean
 * Created by macro on 2022/5/20.
 */
@Configuration
public class CommonSecurityConfig {
    @Bean
    public PasswordEncoder passwordEncoder() {
        return new BCryptPasswordEncoder();
    }
    @Bean
    public IgnoreUrlsConfig ignoreUrlsConfig() {
        return new IgnoreUrlsConfig();
    }
    @Bean
    public JwtTokenUtil jwtTokenUtil() {
        return new JwtTokenUtil();
    }
    @Bean
    public RestfulAccessDeniedHandler restfulAccessDeniedHandler() {
        return new RestfulAccessDeniedHandler();
    }
    @Bean
    public RestAuthenticationEntryPoint restAuthenticationEntryPoint() {
        return new RestAuthenticationEntryPoint();
    }
    @Bean
    public JwtAuthenticationTokenFilter jwtAuthenticationTokenFilter(){
        return new JwtAuthenticationTokenFilter();
    }
    @Bean
    public DynamicAccessDecisionManager dynamicAccessDecisionManager() {
        return new DynamicAccessDecisionManager();
    }
    @Bean
    public DynamicSecurityMetadataSource dynamicSecurityMetadataSource() {
        return new DynamicSecurityMetadataSource();
    }
    @Bean
    public DynamicSecurityFilter dynamicSecurityFilter(){
        return new DynamicSecurityFilter();
    }
}
- 还有一个典型的循环依赖问题,UmsAdminServiceImpl和UmsAdminCacheServiceImpl相互依赖了;
/**
 * 后台管理员管理Service实现类
 * Created by macro on 2018/4/26.
 */
@Service
public class UmsAdminServiceImpl extends ServiceImpl<UmsAdminMapper,UmsAdmin> implements UmsAdminService {
    @Autowired
    private UmsAdminCacheService adminCacheService;
}
/**
 * 后台用户缓存管理Service实现类
 * Created by macro on 2020/3/13.
 */
@Service
public class UmsAdminCacheServiceImpl implements UmsAdminCacheService {
    @Autowired
    private UmsAdminService adminService;
}
- 我们可以创建一个用于获取Spring容器中的Bean的工具类来实现;
/**
 * Spring工具类
 * Created by macro on 2020/3/3.
 */
@Component
public class SpringUtil implements ApplicationContextAware {
    private static ApplicationContext applicationContext;
    // 获取applicationContext
    public static ApplicationContext getApplicationContext() {
        return applicationContext;
    }
    @Override
    public void setApplicationContext(ApplicationContext applicationContext) throws BeansException {
        if (SpringUtil.applicationContext == null) {
            SpringUtil.applicationContext = applicationContext;
        }
    }
    // 通过name获取Bean
    public static Object getBean(String name) {
        return getApplicationContext().getBean(name);
    }
    // 通过class获取Bean
    public static <T> T getBean(Class<T> clazz) {
        return getApplicationContext().getBean(clazz);
    }
    // 通过name,以及Clazz返回指定的Bean
    public static <T> T getBean(String name, Class<T> clazz) {
        return getApplicationContext().getBean(name, clazz);
    }
}
- 然后在UmsAdminServiceImpl中使用该工具类获取Bean来解决循环依赖。
/**
 * 后台管理员管理Service实现类
 * Created by macro on 2018/4/26.
 */
@Service
public class UmsAdminServiceImpl extends ServiceImpl<UmsAdminMapper,UmsAdmin> implements UmsAdminService {
    @Override
    public UmsAdminCacheService getCacheService() {
        return SpringUtil.getBean(UmsAdminCacheService.class);
    }
}
解决跨域问题
在使用Spring Boot 2.7.0版本时,如果不修改之前的跨域配置,通过前端访问会出现跨域问题,后端报错如下。
java.lang.IllegalArgumentException: When allowCredentials is true, allowedOrigins cannot contain the special value "*" since that cannot be set on the "Access-Control-Allow-Origin" response header.
To allow credentials to a set of origins, list them explicitly or consider using "allowedOriginPatterns" instead.
具体的意思就是allowedOrigins已经不再支持通配符*的配置了,改为需要使用allowedOriginPatterns来设置,具体配置修改如下。
/**
 * 全局跨域配置
 * Created by macro on 2019/7/27.
 */
@Configuration
public class GlobalCorsConfig {
    /**
     * 允许跨域调用的过滤器
     */
    @Bean
    public CorsFilter corsFilter() {
        CorsConfiguration config = new CorsConfiguration();
        //允许所有域名进行跨域调用
        config.addAllowedOriginPattern("*");
        //该用法在SpringBoot 2.7.0中已不再支持
        //config.addAllowedOrigin("*");
        //允许跨越发送cookie
        config.setAllowCredentials(true);
        //放行全部原始头信息
        config.addAllowedHeader("*");
        //允许所有请求方法跨域调用
        config.addAllowedMethod("*");
        UrlBasedCorsConfigurationSource source = new UrlBasedCorsConfigurationSource();
        source.registerCorsConfiguration("/**", config);
        return new CorsFilter(source);
    }
}
总结
今天分享了下我的开源项目脚手架mall-tiny,以及它升级SpringBoot 2.7.0的过程。我们在写代码的时候,如果有些用法已经废弃,应该尽量去寻找新的用法来使用,这样才能保证我们的代码足够优雅!
项目地址 https://github.com/macrozheng/mall-tiny
以上就是从零搭建SpringBoot+MyBatisPlus快速开发脚手架的详细内容,更多关于SpringBoot+MyBatisPlus从零搭建的资料请关注我们其它相关文章!
相关推荐
-

SpringBoot+MybatisPlus+Mysql+JSP实战
本文主要介绍了SpringBoot+MybatisPlus+Mysql+JSP实战,分享给大家,具体如下: 放个效果图: 准备项目 首先在MySql控制台输入一下sql语句创建student 数据库和student. create databse student; use student; CREATE TABLE `student` ( `stu_id` bigint(20) NOT NULL, `stu_name` varchar(45) DEFAULT NULL, `stu_sex` va
-
Springboot中MyBatisplus使用IPage和Page分页的实例代码
一.需求:实现Springboot中MyBatisplus使用IPage和Page分页 二.技术:MyBatisplus的IPage和Page 三.实现 1.代码结构 2.代码详情 (1)Controller package com.xkcoding.rbac.security.controller; import lombok.extern.slf4j.Slf4j; import org.springframework.beans.factory.annotation.Autowired; i
-
SpringBoot+MyBatisPlus+Vue 前后端分离项目快速搭建过程(前端篇)
后端篇 SpringBoot+MyBatisPlus+Vue 前后端分离项目快速搭建[后端篇][快速生成后端代码.封装结果集.增删改查.模糊查找][毕设基础框架] 前端篇 创建vue项目 1.找个文件夹进入命令行,输入:vue create vue-front 2.直接回车,等待片刻,稍微有点小久 3.根据提示指令测试 打开浏览器输入:http://localhost:8080/ 安装所需工具 安装的工具会有点多,为了提供更好的拓展性,可以自主选择安装(不建议),后面的代码中都是使用到了,不安装
-
解决SpringBoot整合MybatisPlus分模块管理遇到的bug
前言 这个Bug前前后后折腾了两天才找到答案,虽说不是完全两天的工作时间在调试这个问题,但是过程也确实曲折,所以做一下记录,也当做一次自我反省 背景 SpringBoot 与 MyBatis-Plus 的 pom 依赖 <!-- SpringBoot 版本 --> <parent> <groupId>org.springframework.boot</groupId> <artifactId>spring-boot-starter-parent&
-
SpringBoot+MyBatisPlus+Vue 前后端分离项目快速搭建过程(后端)
数据库准备 data_test.sql: /* SQLyog Enterprise v12.08 (64 bit) MySQL - 5.7.31 : Database - data_test ********************************************************************* */ /*!40101 SET NAMES utf8 */; /*!40101 SET SQL_MODE=''*/; /*!40014 SET @OLD_UNIQUE_
-
SpringBoot+MyBatisPlus+MySQL8实现树形结构查询
本文实例为大家分享了SpringBoot+MyBatisPlus+MySQL8实现树形结构查询,供大家参考,具体内容如下 场景: 今天在实现权限功能模块时,需要将查询的权限数据,以树形结构的方式返回给前端. 功能实现: 第一步:权限表结构定义及其功能演示数据. DROP TABLE IF EXISTS `baoan_privilege`; CREATE TABLE `baoan_privilege` ( `id` varchar(64) CHARACTER SET utf8 COLLATE ut
-
从零搭建SpringBoot+MyBatisPlus快速开发脚手架
目录 前言 聊聊mall-tiny项目 项目简介 项目演示 技术选型 数据库表结构 接口文档 使用流程 升级过程 Swagger升级 Spring Security升级 MyBatis-Plus升级 解决循环依赖问题 解决跨域问题 总结 前言 关注我Github的小伙伴应该了解,之前我开源了一款快速开发脚手架mall-tiny,该脚手架继承了mall项目的技术栈,拥有完整的权限管理功能.最近抽空把该项目支持了Spring Boot 2.7.0,今天再和大家聊聊这个脚手架,同时聊聊升级项目到Spr
-
Maven脚手架如何基于jeecg实现快速开发
一.jeecg-boot整体介绍 JeecgBoot是一款基于SpringBoot+代码生成器的快速开发平台,采用前后端分离架构:SpringBoot,Mybatis,Shiro,JWT,Vue&Ant Design.自v2.3.0版本后支持微服务方案,支持快速切换成cloud,其技术栈为: 服务注册:nacos 配置中心:nacos-config 理由网关: gateway 服务间调用:openfeign 熔断和降级:sentinel 服务监控:Spring Boot Admin 本文略去介绍
-
idea快速搭建springboot项目的操作方法
Spring Boot是由Pivotal团队提供的全新框架,设计目的是用来简化新Spring应用的初始搭建以及开发过程.它主要推崇的是'消灭配置',实现零配置. 那么,如何在idea中创建一个springboot项目呢? 一.在你建立的工程下创建 Module 选择Spring initializr创建. 二.在Type处选择: Maven Project(项目的构建工具) 三.创建依赖时勾上web,mybatis,mysql(这个看你个人需要吧,可以自主选择) 建立好的项目结构如下: 相对应的
-
全新打包工具parcel零配置vue开发脚手架
parcel-vue 一个基于Parcel打包工具的 VueJS急速开发脚手架解决方案,强烈建议使用node8.0以上 项目地址: https://github.com/w3c-king/parcel-vue 初始化项目 $ git clone https://github.com/w3c-king/parcel-vue.git 安装依赖 $ cd parce-vue $ npm install 其中 parcel-bundler 是主要的工具,对于 vue 结尾的单文件,需要单独处理文件类型,
-
从零搭建Spring Boot脚手架整合OSS作为文件服务器的详细教程
1. 前言 文件服务器是一个应用必要的组件之一.最早我搞过FTP,然后又用过FastDFS,接私活的时候我用MongoDB也凑合凑合.现如今时代不同了,开始流行起了OSS. Gitee: https://gitee.com/felord/kono day06 分支 欢迎Star GitHub: https://github.com/NotFound403/kono day06 分支 欢迎Star 2. 什么是OSS 全称为Object Storage Service,也叫对象存储服务,是一种解决
-
springboot项目快速搭建的方法步骤
1. 问题描述 springboot的面世,成为Java开发者的一大福音,大大提升了开发的效率,其实springboot只是在maven的基础上,对已有的maven gav进行了封装而已,今天用最简单的代码快速入门springboot. 2. 解决方案 强烈推荐大家使用Idea的付费版(破解感谢下蓝宇),Idea对maven.git等插件支持的更加好. 使用idea自带的spring Initializr(实际调用的是springboot的官网上的initializr),快速新建springbo
-
教你怎么用SpringBoot+Mybati-Plus快速搭建代码
前言 先放一个官网吧,其实本案例就是根据官网案例来的,只是进行了修改配置. Mybatis-plus官网 一.搭建一个springboot项目 这一步应该不用多说了,使用idea可以非常方便的就搭建出来了. 二.配置依赖 <?xml version="1.0" encoding="UTF-8"?> <project xmlns="http://maven.apache.org/POM/4.0.0" xmlns:xsi="
-
springboot结合mybatis-plus快速生成项目模板的方法
目录 mybatis-plus简介: 项目模板 1.项目概览 2.美化swagger-ui mybatis-plus简介: Mybatis-Plus(简称MP)是一个 Mybatis 的增强工具,在 Mybatis 的基础上只做增强不做改变,为简化开发.提高效率而生.这是官方给的定义,关于mybatis-plus的更多介绍及特性,可以参考mybatis-plus官网.那么它是怎么增强的呢?其实就是它已经封装好了一些crud方法,我们不需要再写xml了,直接调用这些方法就行,就类似于JPA. 项目