Spring Cloud Gateway动态路由Apollo实现详解
目录
- 背景
- 路由的加载
- 实现动态路由
背景
在之前我们了解的Spring Cloud Gateway配置路由方式有两种方式
- 通过配置文件
spring:
  cloud:
    gateway:
      routes:
        - id: test
          predicates:
            - Path=/ms/test/*
          filters:
            - StripPrefix=2
          uri: http://localhost:9000
- 通过JavaBean
    @Bean
    public RouteLocator routeLocator(RouteLocatorBuilder builder) {
        return builder.routes()
                .route(r -> r.path("/ms/test/**")
                .filters(f -> f.stripPrefix(2))
                .uri("http://localhost:9000"))
                .build();
    }
但是遗憾的是这两种方式都不支持动态路由,都需要重启服务。 所以我们需要对Spring Cloud Gateway进行改造,在改造的时候我们就需要看看源码了解下Spring Cloud Gateway的路由加载
路由的加载
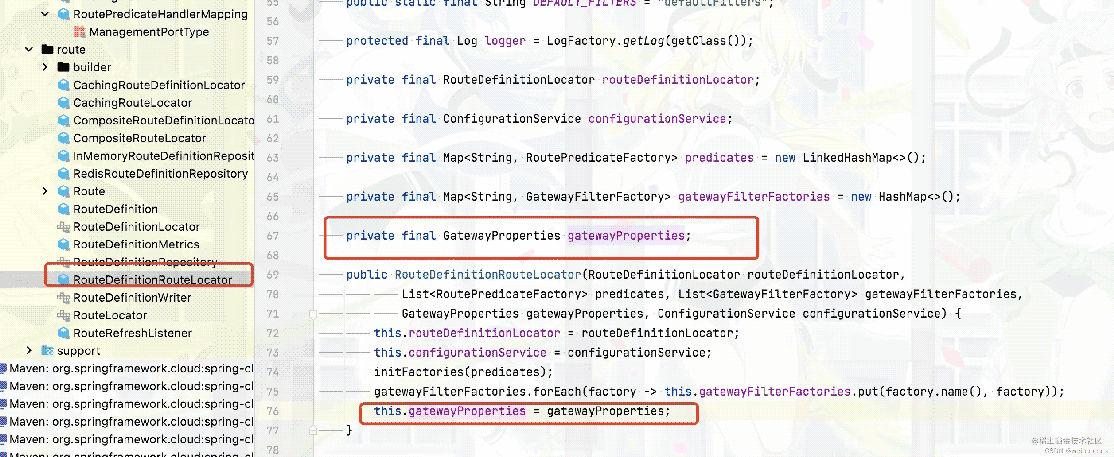
我们之前分析了路由的加载主要在GatewayAutoConfiguration的routeDefinitionRouteLocator方法加载的

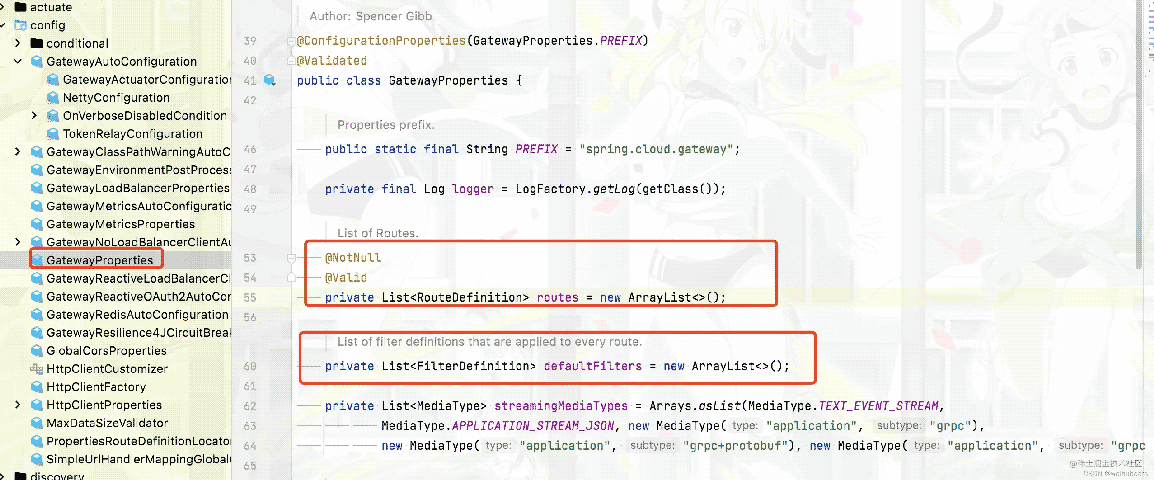
实际上最终获取的路由信息都是在GatewayProperties这个配置类中


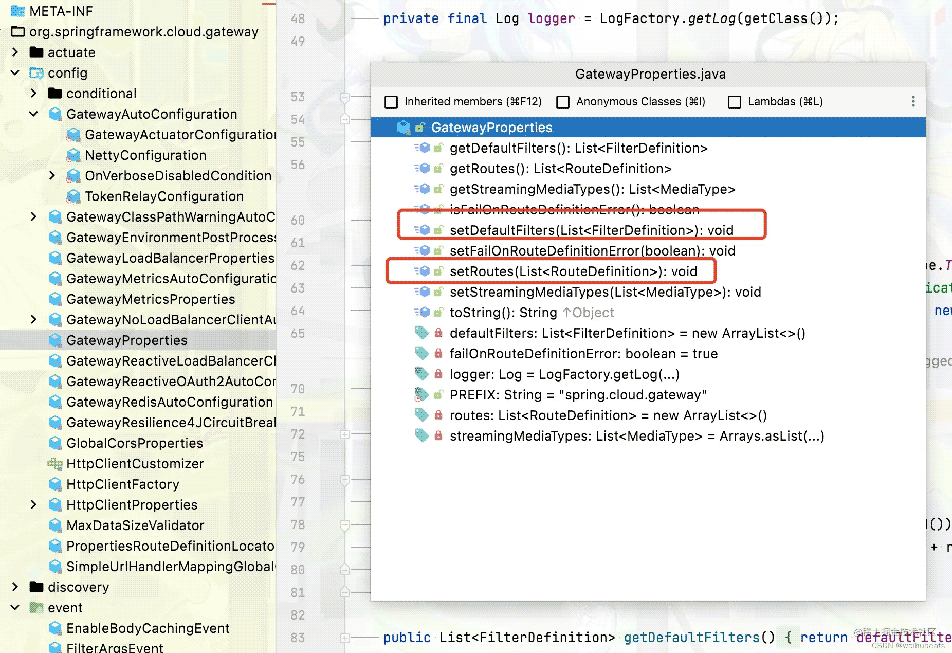
所以我们在动态路由的时候修改GatewayProperties中的属性即可,即
List<RouteDefinition> routes
List<FilterDefinition> defaultFilters
恰巧Spring Cloud Gateway也提供了相应的get、set方法

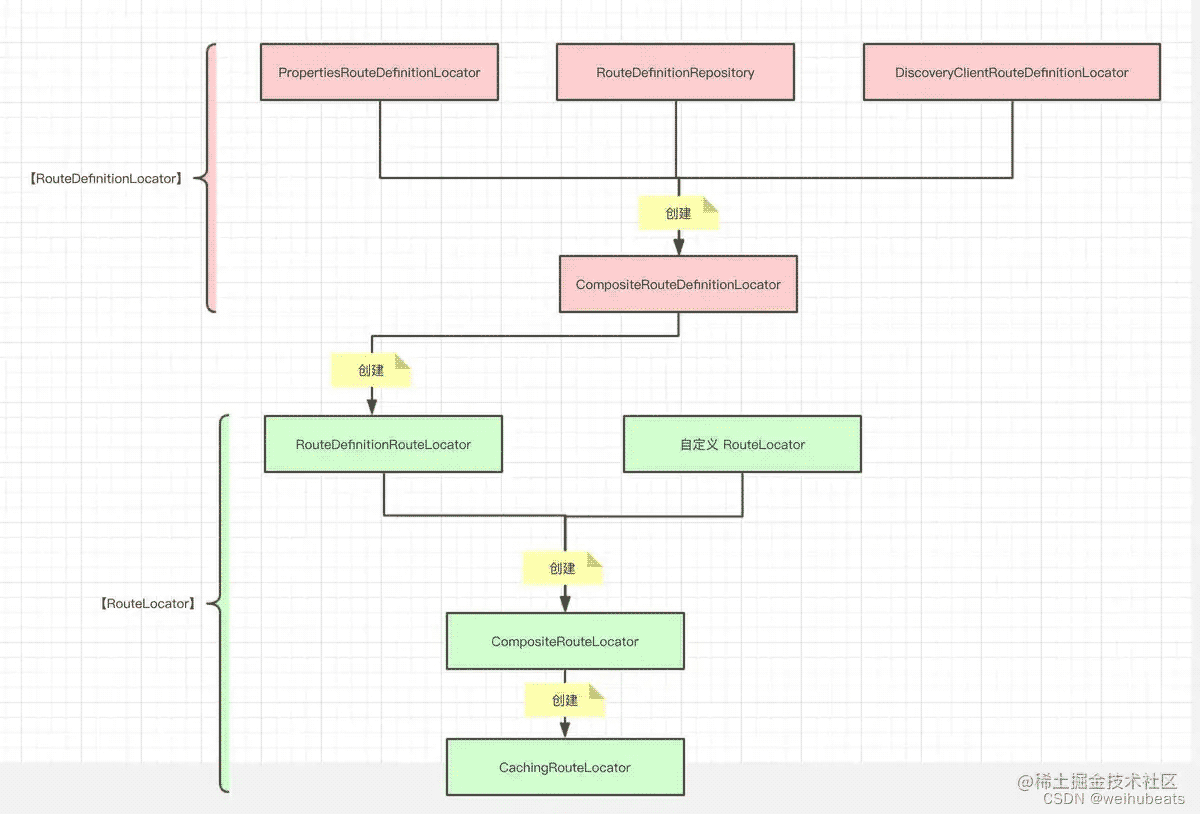
实际如果我们修改了该属性我们会发现并不会立即生效,因为我们会发现还有一个RouteLocator就是CachingRouteLocator,并且在配置Bean的时候加了注解@Primary,说明最后使用额RouteLocator实际是CachingRouteLocator

CachingRouteLocator最后还是使用RouteDefinitionRouteLocator类加载的,也是就我们上面分析的,看CachingRouteLocator就知道是缓存作用

这里引用网上一张加载图片

参考https://www.jb51.net/article/219238.htm
所以看到这里我们知道我们还需要解决的一个问题就是更新缓存,如何刷新缓存呢,这里Spring Cloud Gateway利用spring的事件机制给我提供了扩展


所以我们要做的事情就是这两件事:
GatewayProperties- 刷新缓存
实现动态路由
这里代码参考 github.com/apolloconfi…
@Component
@Slf4j
public class GatewayPropertiesRefresher implements ApplicationContextAware, ApplicationEventPublisherAware {
	private static final String ID_PATTERN = "spring\\.cloud\\.gateway\\.routes\\[\\d+\\]\\.id";
	private static final String DEFAULT_FILTER_PATTERN = "spring\\.cloud\\.gateway\\.default-filters\\[\\d+\\]\\.name";
	private ApplicationContext applicationContext;
	private ApplicationEventPublisher publisher;
	@Autowired
	private GatewayProperties gatewayProperties;
	@Override
	public void setApplicationContext(ApplicationContext applicationContext) throws BeansException {
		this.applicationContext = applicationContext;
	}
	@Override
	public void setApplicationEventPublisher(ApplicationEventPublisher applicationEventPublisher) {
		this.publisher = applicationEventPublisher;
	}
	@ApolloConfigChangeListener(value = "route.yml",interestedKeyPrefixes = "spring.cloud.gateway.")
	public void onChange(ConfigChangeEvent changeEvent) {
		refreshGatewayProperties(changeEvent);
	}
	/***
	 * 刷新org.springframework.cloud.gateway.config.PropertiesRouteDefinitionLocator中定义的routes
	 *
	 * @param changeEvent
	 * @return void
	 * @author ksewen
	 * @date 2019/5/21 2:13 PM
	 */
	private void refreshGatewayProperties(ConfigChangeEvent changeEvent) {
		log.info("Refreshing GatewayProperties!");
		preDestroyGatewayProperties(changeEvent);
		this.applicationContext.publishEvent(new EnvironmentChangeEvent(changeEvent.changedKeys()));
		refreshGatewayRouteDefinition();
		log.info("GatewayProperties refreshed!");
	}
	/***
	 * GatewayProperties没有@PreDestroy和destroy方法
	 * org.springframework.cloud.context.properties.ConfigurationPropertiesRebinder#rebind(java.lang.String)中destroyBean时不会销毁当前对象
	 * 如果把spring.cloud.gateway.前缀的配置项全部删除(例如需要动态删除最后一个路由的场景),initializeBean时也无法创建新的bean,则return当前bean
	 * 若仍保留有spring.cloud.gateway.routes[n]或spring.cloud.gateway.default-filters[n]等配置,initializeBean时会注入新的属性替换已有的bean
	 * 这个方法提供了类似@PreDestroy的操作,根据配置文件的实际情况把org.springframework.cloud.gateway.config.GatewayProperties#routes
	 * 和org.springframework.cloud.gateway.config.GatewayProperties#defaultFilters两个集合清空
	 *
	 * @param
	 * @return void
	 * @author ksewen
	 * @date 2019/5/21 2:13 PM
	 */
	private synchronized void preDestroyGatewayProperties(ConfigChangeEvent changeEvent) {
		log.info("Pre Destroy GatewayProperties!");
		final boolean needClearRoutes = this.checkNeedClear(changeEvent, ID_PATTERN, this.gatewayProperties.getRoutes()
				.size());
		if (needClearRoutes) {
			this.gatewayProperties.setRoutes(new ArrayList<>());
		}
		final boolean needClearDefaultFilters = this.checkNeedClear(changeEvent, DEFAULT_FILTER_PATTERN, this.gatewayProperties.getDefaultFilters()
				.size());
		if (needClearDefaultFilters) {
			this.gatewayProperties.setDefaultFilters(new ArrayList<>());
		}
		log.info("Pre Destroy GatewayProperties finished!");
	}
	private void refreshGatewayRouteDefinition() {
		log.info("Refreshing Gateway RouteDefinition!");
		this.publisher.publishEvent(new RefreshRoutesEvent(this));
		log.info("Gateway RouteDefinition refreshed!");
	}
	/***
	 * 根据changeEvent和定义的pattern匹配key,如果所有对应PropertyChangeType为DELETED则需要清空GatewayProperties里相关集合
	 *
	 * @param changeEvent
	 * @param pattern
	 * @param existSize
	 * @return boolean
	 * @author ksewen
	 * @date 2019/5/23 2:18 PM
	 */
	private boolean checkNeedClear(ConfigChangeEvent changeEvent, String pattern, int existSize) {
		return changeEvent.changedKeys().stream().filter(key -> key.matches(pattern))
				.filter(key -> {
					ConfigChange change = changeEvent.getChange(key);
					return PropertyChangeType.DELETED.equals(change.getChangeType());
				}).count() == existSize;
	}
}
然后我们在apollo添加namespace:route.yml
配置内容如下:
spring:
  cloud:
    gateway:
      routes:
        - id: test
          predicates:
            - Path=/ms/test/*
          filters:
            - StripPrefix=2
          uri: http://localhost:9000
然后我们可以通过访问地址: http:localhost:8080/ms/test/health
看删除后是否是404,加上后是否可以正常动态路由
值得注意的是上面@ApolloConfigChangeListener中如果没有添加新的namespace,value可以不用填写,如果配置文件是yml配置文件,在监听的时候需要指定文件后缀
以上就是Spring Cloud Gateway动态路由Apollo实现详解的详细内容,更多关于Spring Cloud Gateway Apollo的资料请关注我们其它相关文章!

